Canvas as MCP Server
Every Fused Canvas can be turned into an MCP server in one click — giving AI tools like Claude Code, the Claude desktop app, and claude.ai direct access to your UDFs as callable tools. You can also embed an AI chat interface directly on the canvas using the ai-chat widget.

Connect your canvas to Claude Code via MCP
Step 1: Copy the MCP command from your canvas
Open your canvas in Workbench, click Share, then Copy MCP. This copies a ready-to-run terminal command:
claude mcp add --transport http fused-your-canvas-name \
  "https://udf.ai/fc_YOUR_CANVAS_TOKEN.mcp"
The command uses --transport http so Claude can authenticate with your canvas immediately.
The connecting_ai_agents_mcp canvas is already set up as a public example — run the command below to connect it and follow the steps:
claude mcp add --transport http fused-connecting_ai_agents_mcp \
  "https://udf.ai/fc_5jBXLhLiXluY9yCtcHbOTV.mcp"
Step 2: Run the command in your terminal
Paste and run the command. Claude Code adds the MCP server to its config and responds with:
Added MCP server fused-your-canvas-name
Step 3: Ask Claude about your data
Claude can now discover and call all visible UDFs on your canvas as tools. Try:
"What UDFs do you have available?" "Run [your-udf-name] with [param]=value"
Only UDFs that are visible on the canvas are exposed through the MCP endpoint. Hide internal or helper UDFs in Workbench to keep the tool list focused on what agents should call directly.
Use the visibility toggle on each UDF node in Workbench to control what Claude sees. Hidden UDFs still run when called by other UDFs — they just won't appear as MCP tools.
Works with any MCP-compatible client
The same MCP URL works with Cursor, VS Code (with MCP extensions), and any other tool that supports the Model Context Protocol — not just Claude Code.
Connect to Claude Desktop App
The same connector flow works in both the Claude desktop app and at claude.ai. Once connected, Claude can call your canvas UDFs as tools directly from the chat.
Personal accounts (Free, Pro, Max)
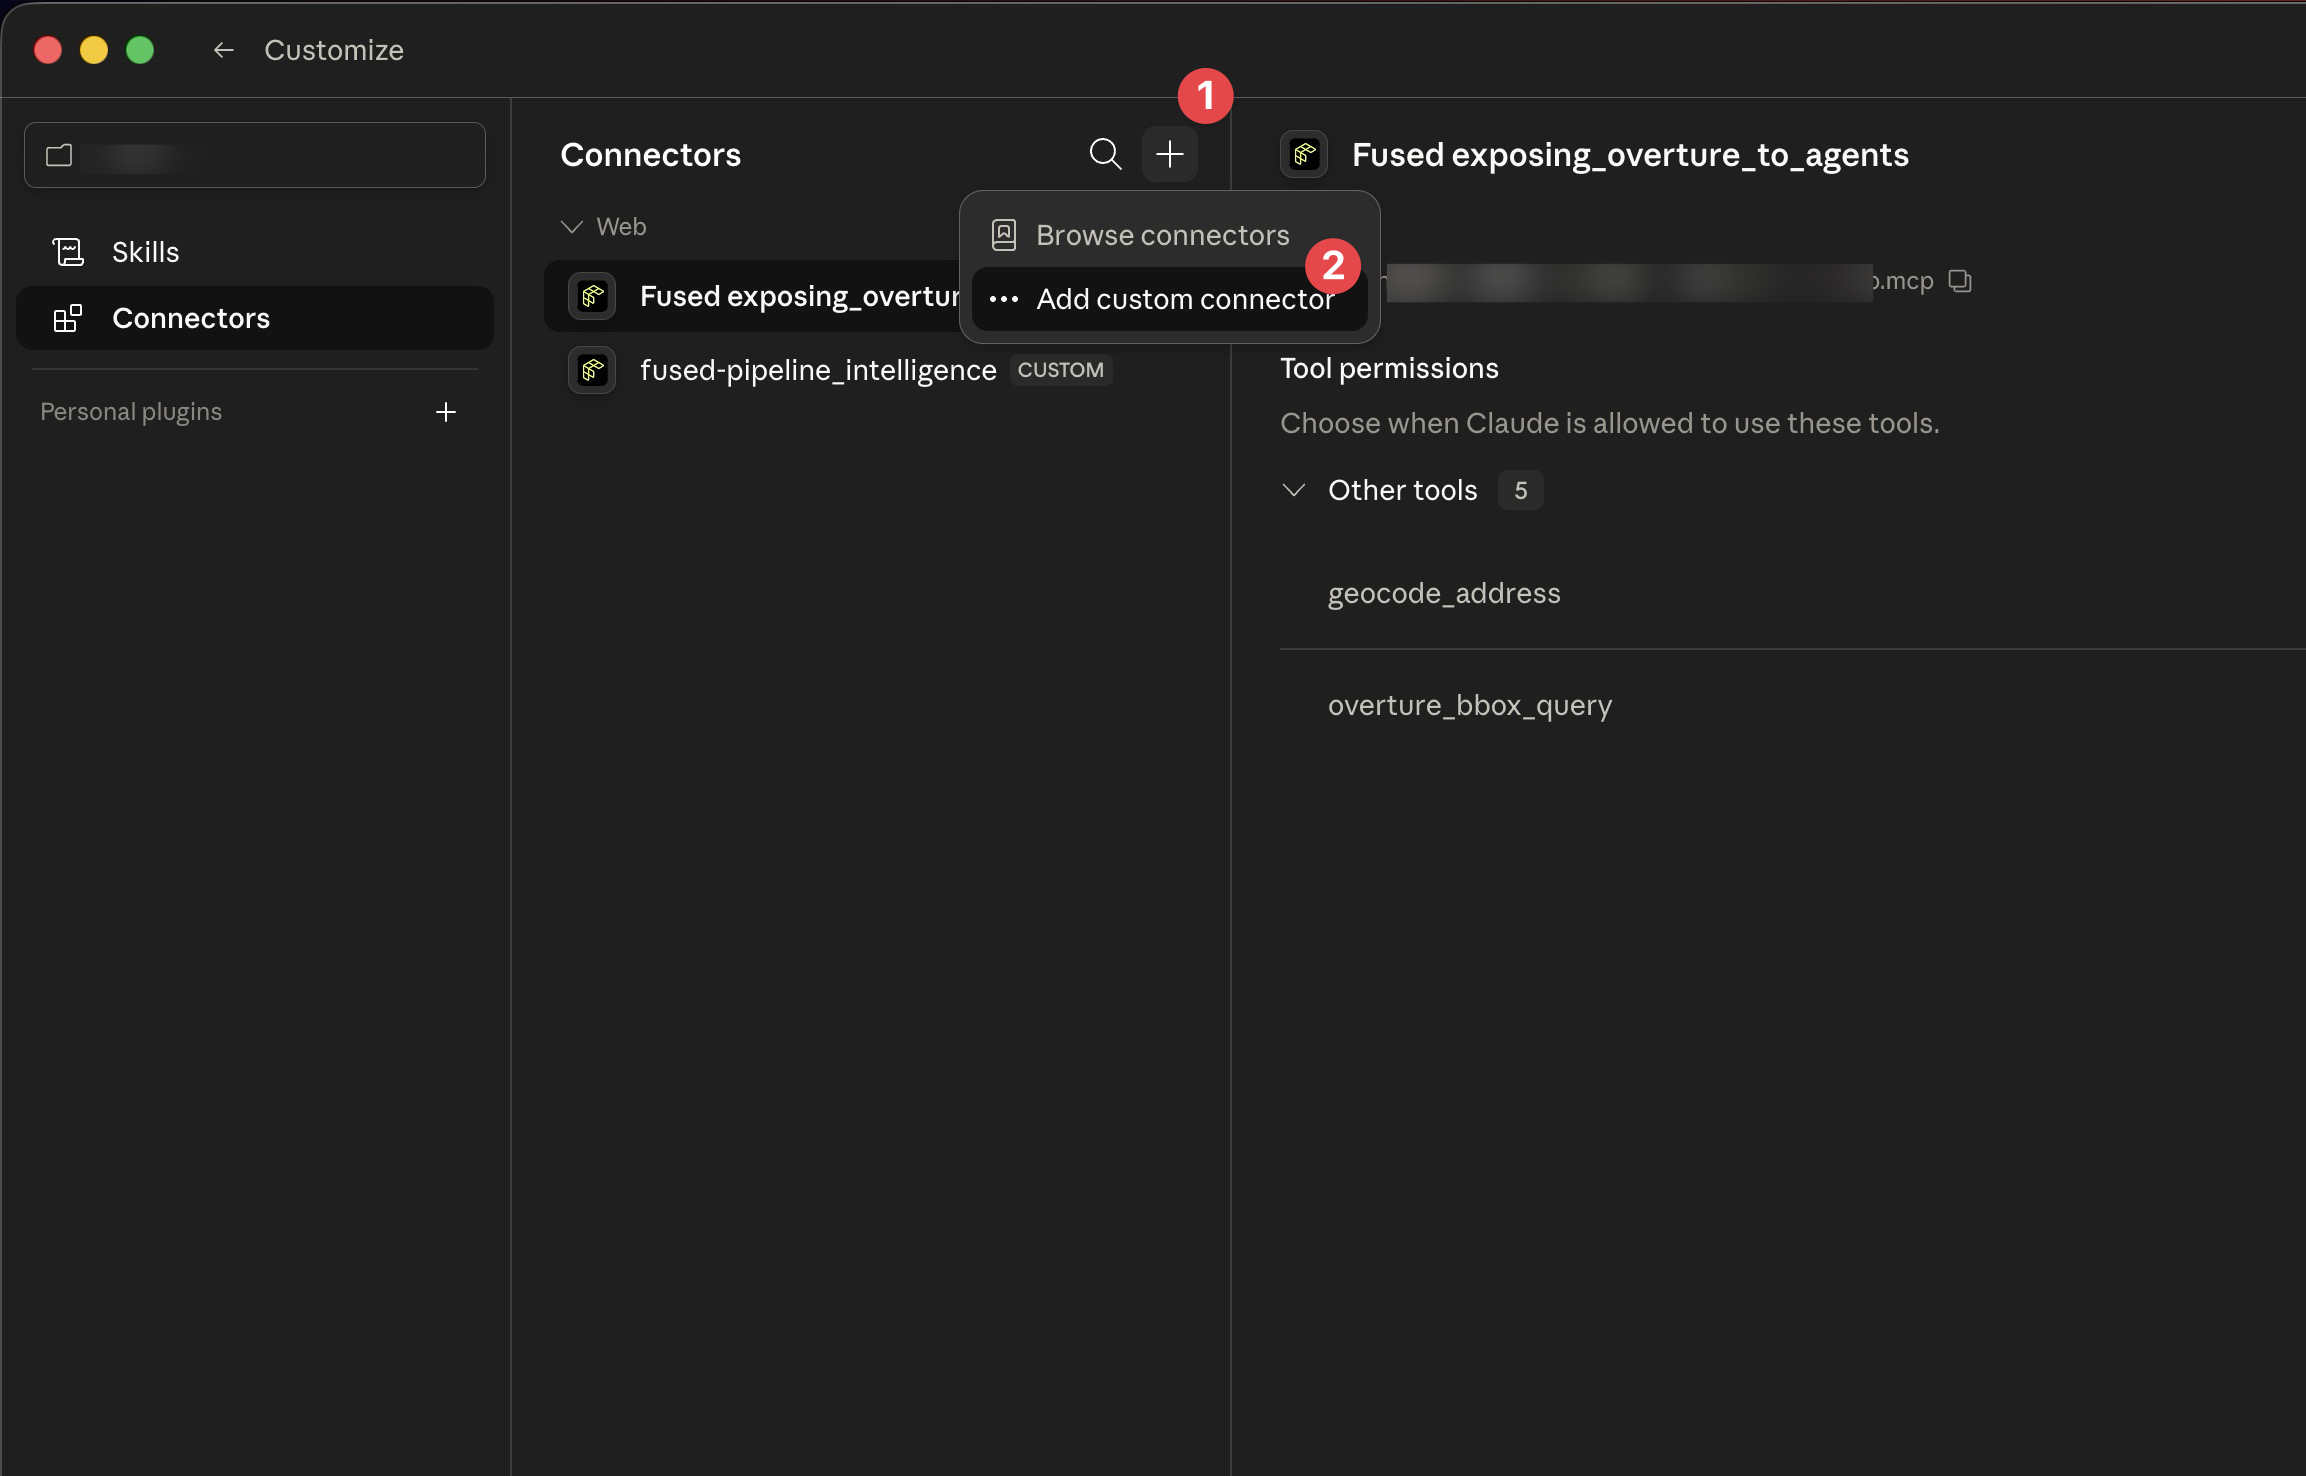
- Open Claude and click Customize in the sidebar, then select Connectors
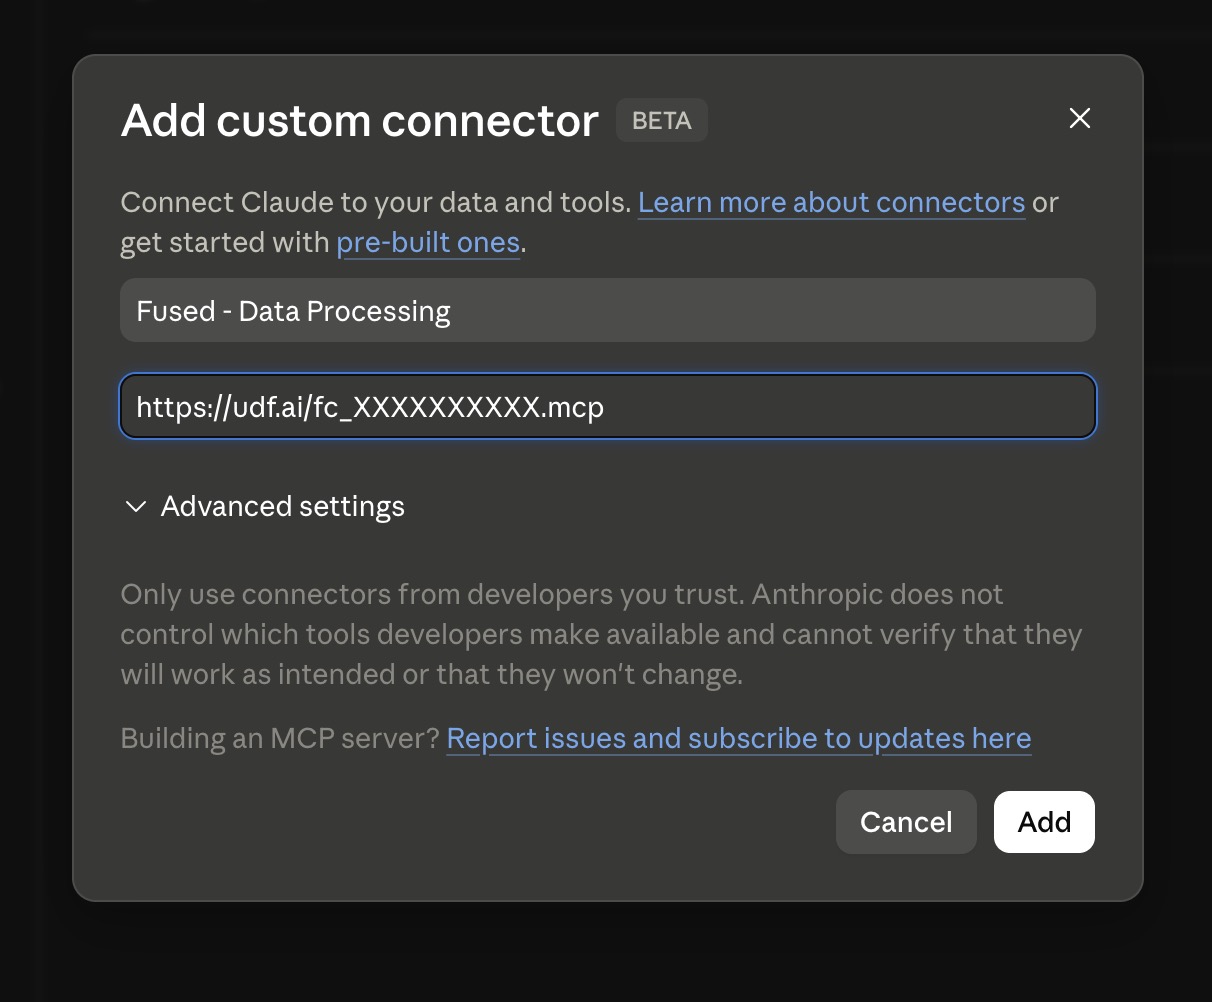
- Click + → Add custom connector
- Give the connector a name (e.g. "Fused - My Canvas") and paste your canvas MCP URL (open your canvas in Workbench, click Share → Copy MCP to get it)
- Click Add
Claude can now call your canvas UDFs directly from the chat:

Only visible UDFs on your canvas are exposed as tools. Widget nodes and UDFs marked as hidden are not accessible. Use the visibility toggle in Workbench to control what Claude sees.
Team & Enterprise accounts
Individual members cannot add custom connectors — only Owners (admins) can configure them org-wide.
Owner setup:
- Go to Organization settings → Connectors and add the MCP URL there
Member setup (once the Owner has added the connector):
- Go to Customize → Connectors
- Find the connector (tagged Custom) and click Connect to authenticate individually
If you're on a Team or Enterprise plan and the connector hasn't been set up yet, ask your workspace admin to add it under Organization settings → Connectors first.
Add an AI chat widget to your canvas
The ai-chat widget embeds a persistent chat interface directly on your canvas. It has access to all UDFs connected to the widget node and can answer questions, stream responses, and return structured data — no separate AI tool required.
Open the connecting_ai_agents_mcp canvas to see the ai-chat widget connected to a live UDF.

The ai-chat widget requires you to be logged in to fused.io. Unauthenticated viewers will see a login prompt.
How to add it
- Click the Widget icon in the canvas toolbar to add a new widget node
- In the widget JSON editor, click Presets and select ai-chat
- Connect the UDF nodes you want the chat to query by drawing edges from them to the widget node
The preset inserts this widget JSON:
{
  "type": "ai-chat",
  "props": {
    "title": "Ask About UDFs",
    "description": "Ask questions about the UDFs connected to this workspace",
    "style": "height: 400px; border-radius: 8px;"
  }
}
All props are optional. You can add a systemPromptExtra string to give the AI extra instructions specific to your data:
{
  "type": "ai-chat",
  "props": {
    "title": "Ask About UDFs",
    "description": "Ask questions about the UDFs connected to this workspace",
    "style": "height: 400px; border-radius: 8px;",
    "systemPromptExtra": "Always respond with row-level breakdowns. Format numbers with commas."
  }
}
For full widget documentation including all available props and how to compose widgets, see Widgets.
See also
- Widgets — full reference for all widget types including
ai-chat - Building for Agents — how to design UDFs that work well as MCP tools
- Overture Maps MCP Agent — a complete example of a canvas exposed as an MCP server
- Tokens & endpoints — managing canvas access and session tokens
- Write UDFs securely — security considerations for agent-facing UDFs