Canvas Checkpoints
Canvas Checkpoints let you capture a snapshot of your Canvas at a point in time.
Why use checkpoints?
- Version control your work — Save the current state before a big refactor so you can always roll back.
- Team collaboration — Checkpoints are the basis for pushing and pulling code to GitHub. Once you create a checkpoint, you can open a PR directly from it. See Versions for more on the GitHub workflow.
Creating a checkpoint
- Make changes to your Canvas (edit UDFs, add widgets, update connections).
- Open the Canvas checkpoints panel and click Create checkpoint.
- Select the UDFs you want to include — each UDF shows a code diff of what changed.
- Give your checkpoint a name and click Create checkpoint.
Creating a checkpoint, deleting a UDF, and restoring the Canvas back to the saved checkpoint.
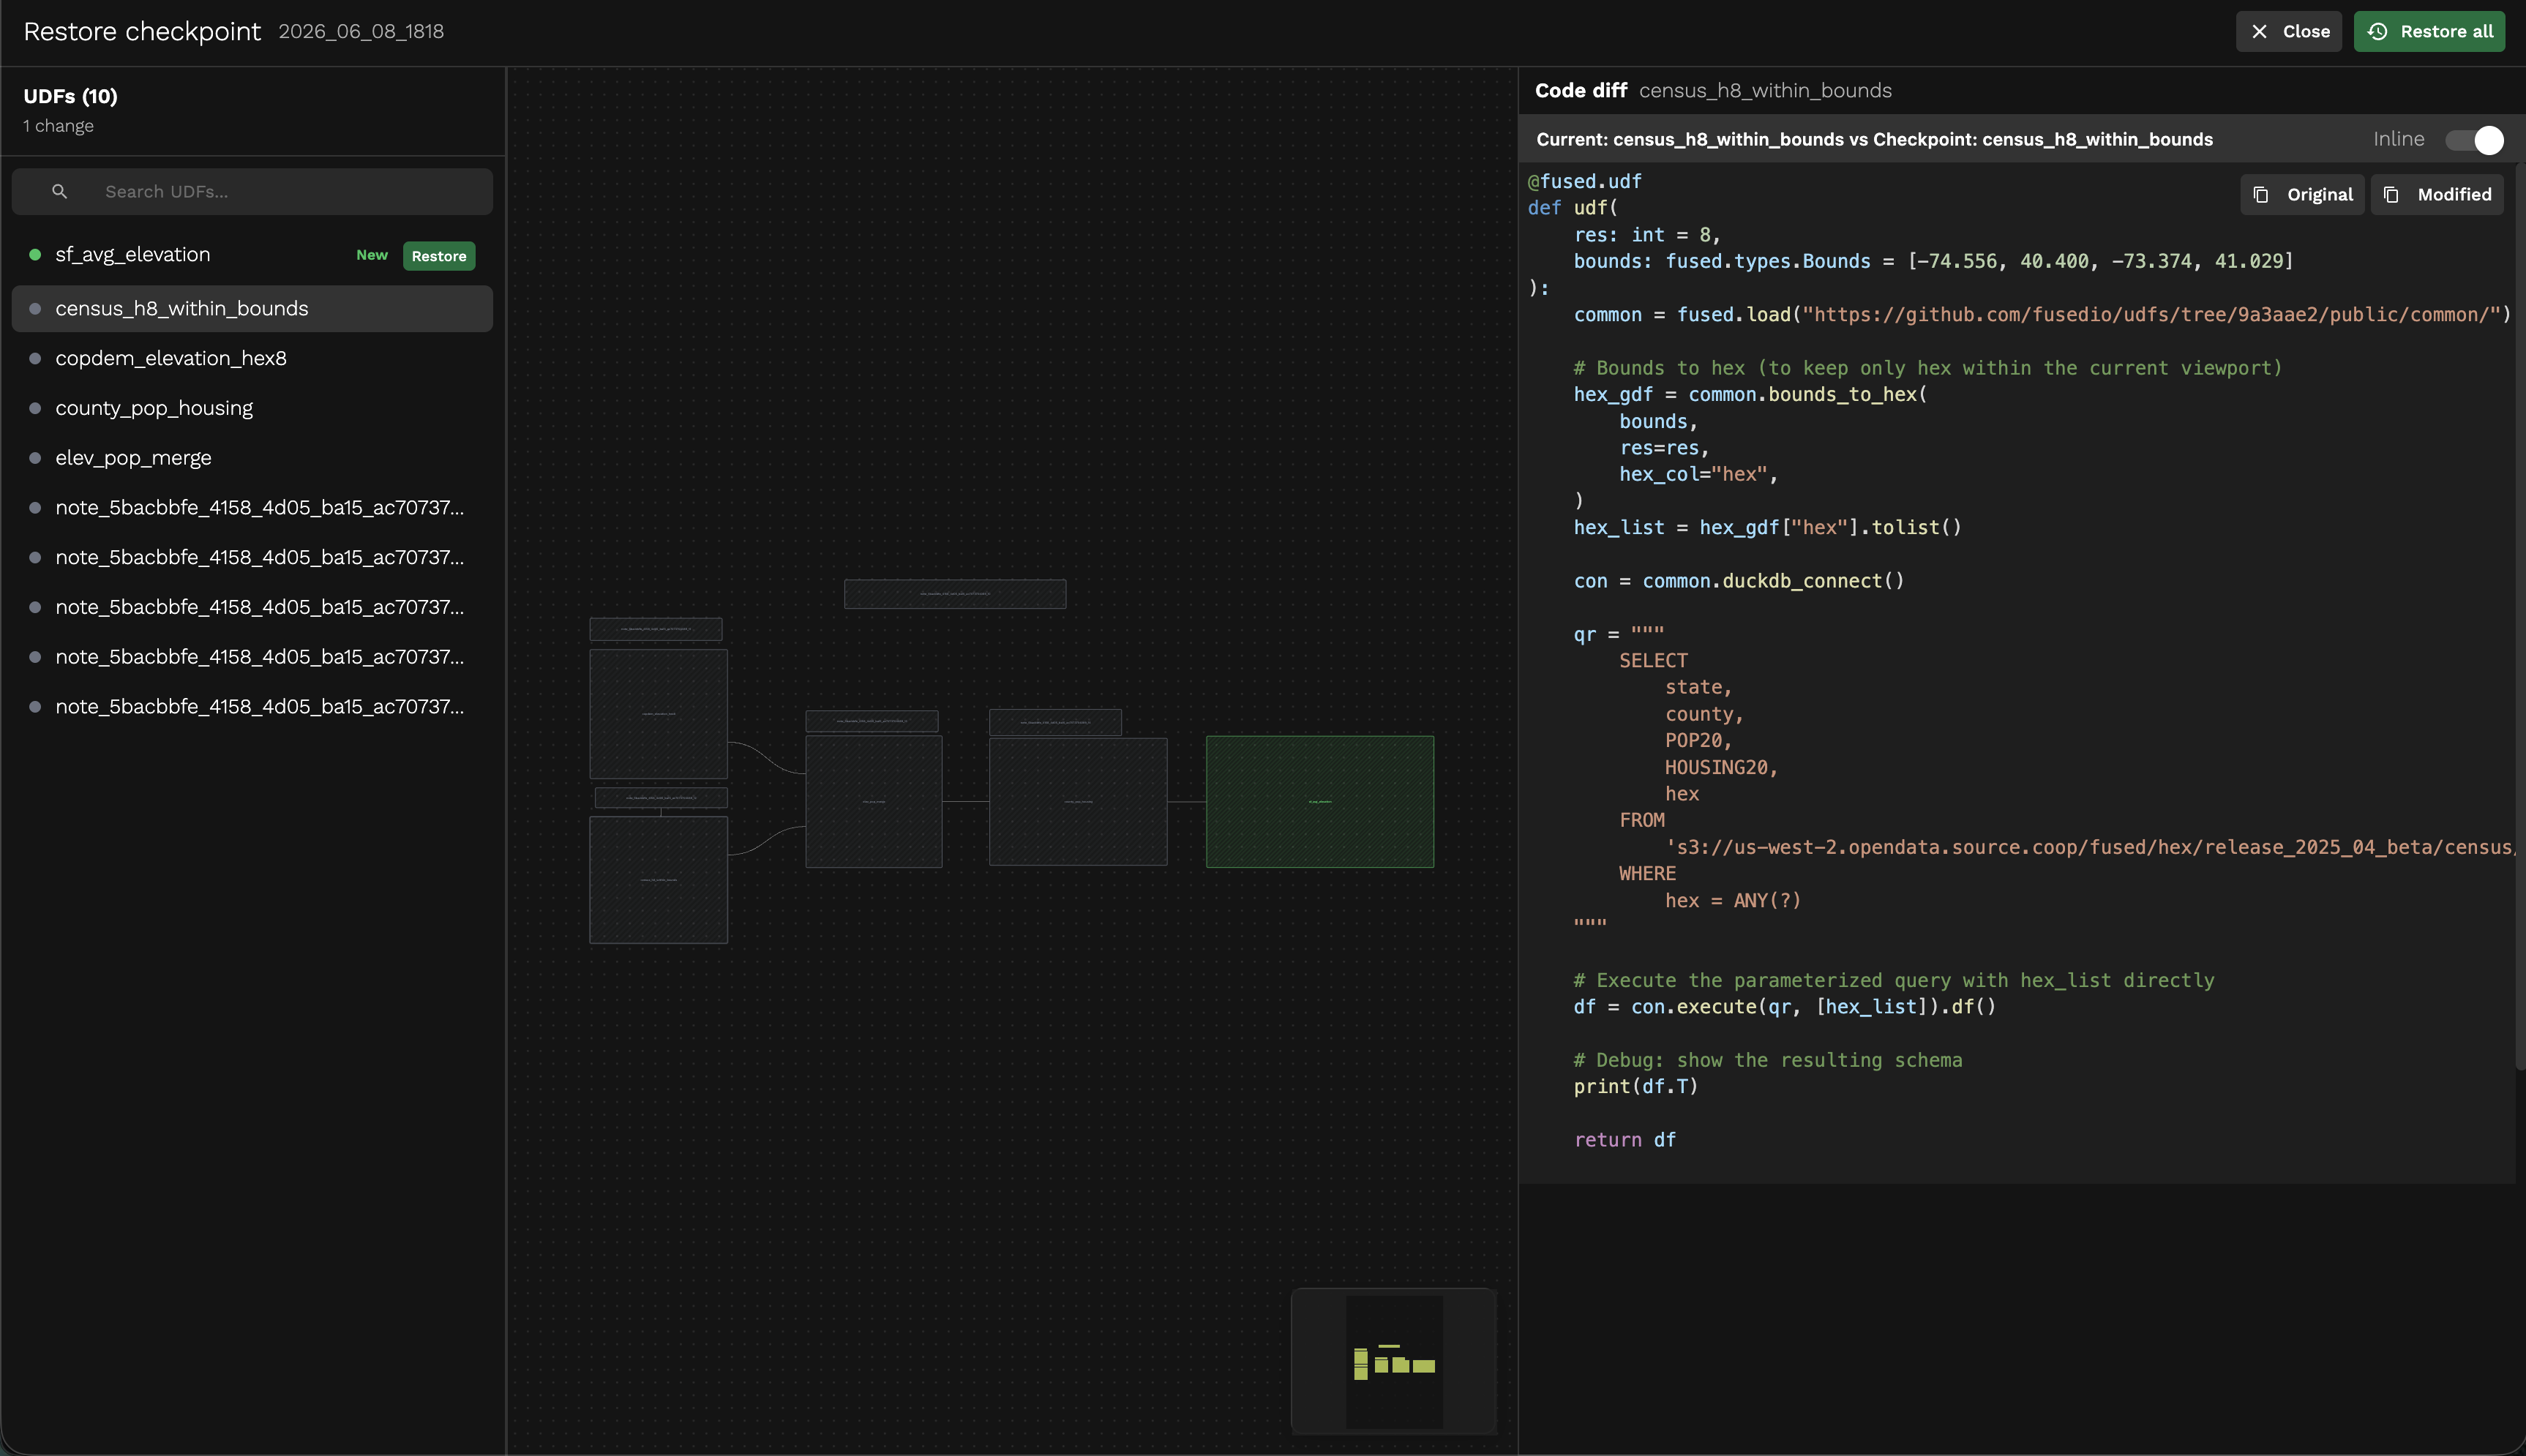
Restoring a checkpoint
- Open the Canvas checkpoints panel and click Restore on a checkpoint.
- Review the code diff for each UDF to see what will change.
- Restore individual UDFs by clicking Restore next to each one, or click Restore all to revert the entire Canvas to that checkpoint.
Managing checkpoints
From the checkpoints panel you can:
- Delete — Remove a checkpoint you no longer need.
- Create a PR — Open a pull request on GitHub directly from a checkpoint (requires GitHub integration).
- Clone from GitHub — Pull an existing checkpoint from your connected repository.