QGIS
QGIS is an Open Source Desktop GIS platform. Since its inception in 2002, it's become a staple in the geospatial data stack. Download QGIS here.
Fused UDFs can be configured to return raster tile and vector data in formats that QGIS can load. The QGIS User Guide describes how QGIS handles different data types. This walkthrough shows how to generate URL endpoints to easily load data into QGIS.
1. Generate a signed URL for a UDF
First, create a UDF and generate an HTTP endpoint.
2. Load data into QGIS
QGIS supports loading data from UDFs called as both File and Tile.
Raster Tiles (Streamed data)
Dynamically render XYZ raster tiles on the QGIS map.
As an example, the "Sentinel Tile Example" public UDF returns an XYZ tile URL of NDVI from the Sentinel dataset. Create a new instance of it on your workbench, generate a shared URL, then modify the URL query parameters:
- Set
dtype_out_rastertopng. - Set replace the values after
/run/tileswith the/{z}/{x}/{y}template. - Set UDF parameters as needed.
For example:
https://www.fused.io/server/v1/realtime-shared/da71c7bf79376f2e88b37be9ecd2679f2e40a5b79f9b0f2c75e7ea9a3f0c5171/run/tiles/{z}/{x}/{y}?dtype_out_raster=png
Open the modal to create a new raster XYZ layer by right-clicking: XYZ Tiles -> New Connection. Now paste the UDF URL in the URI field and configure the layer as shown.
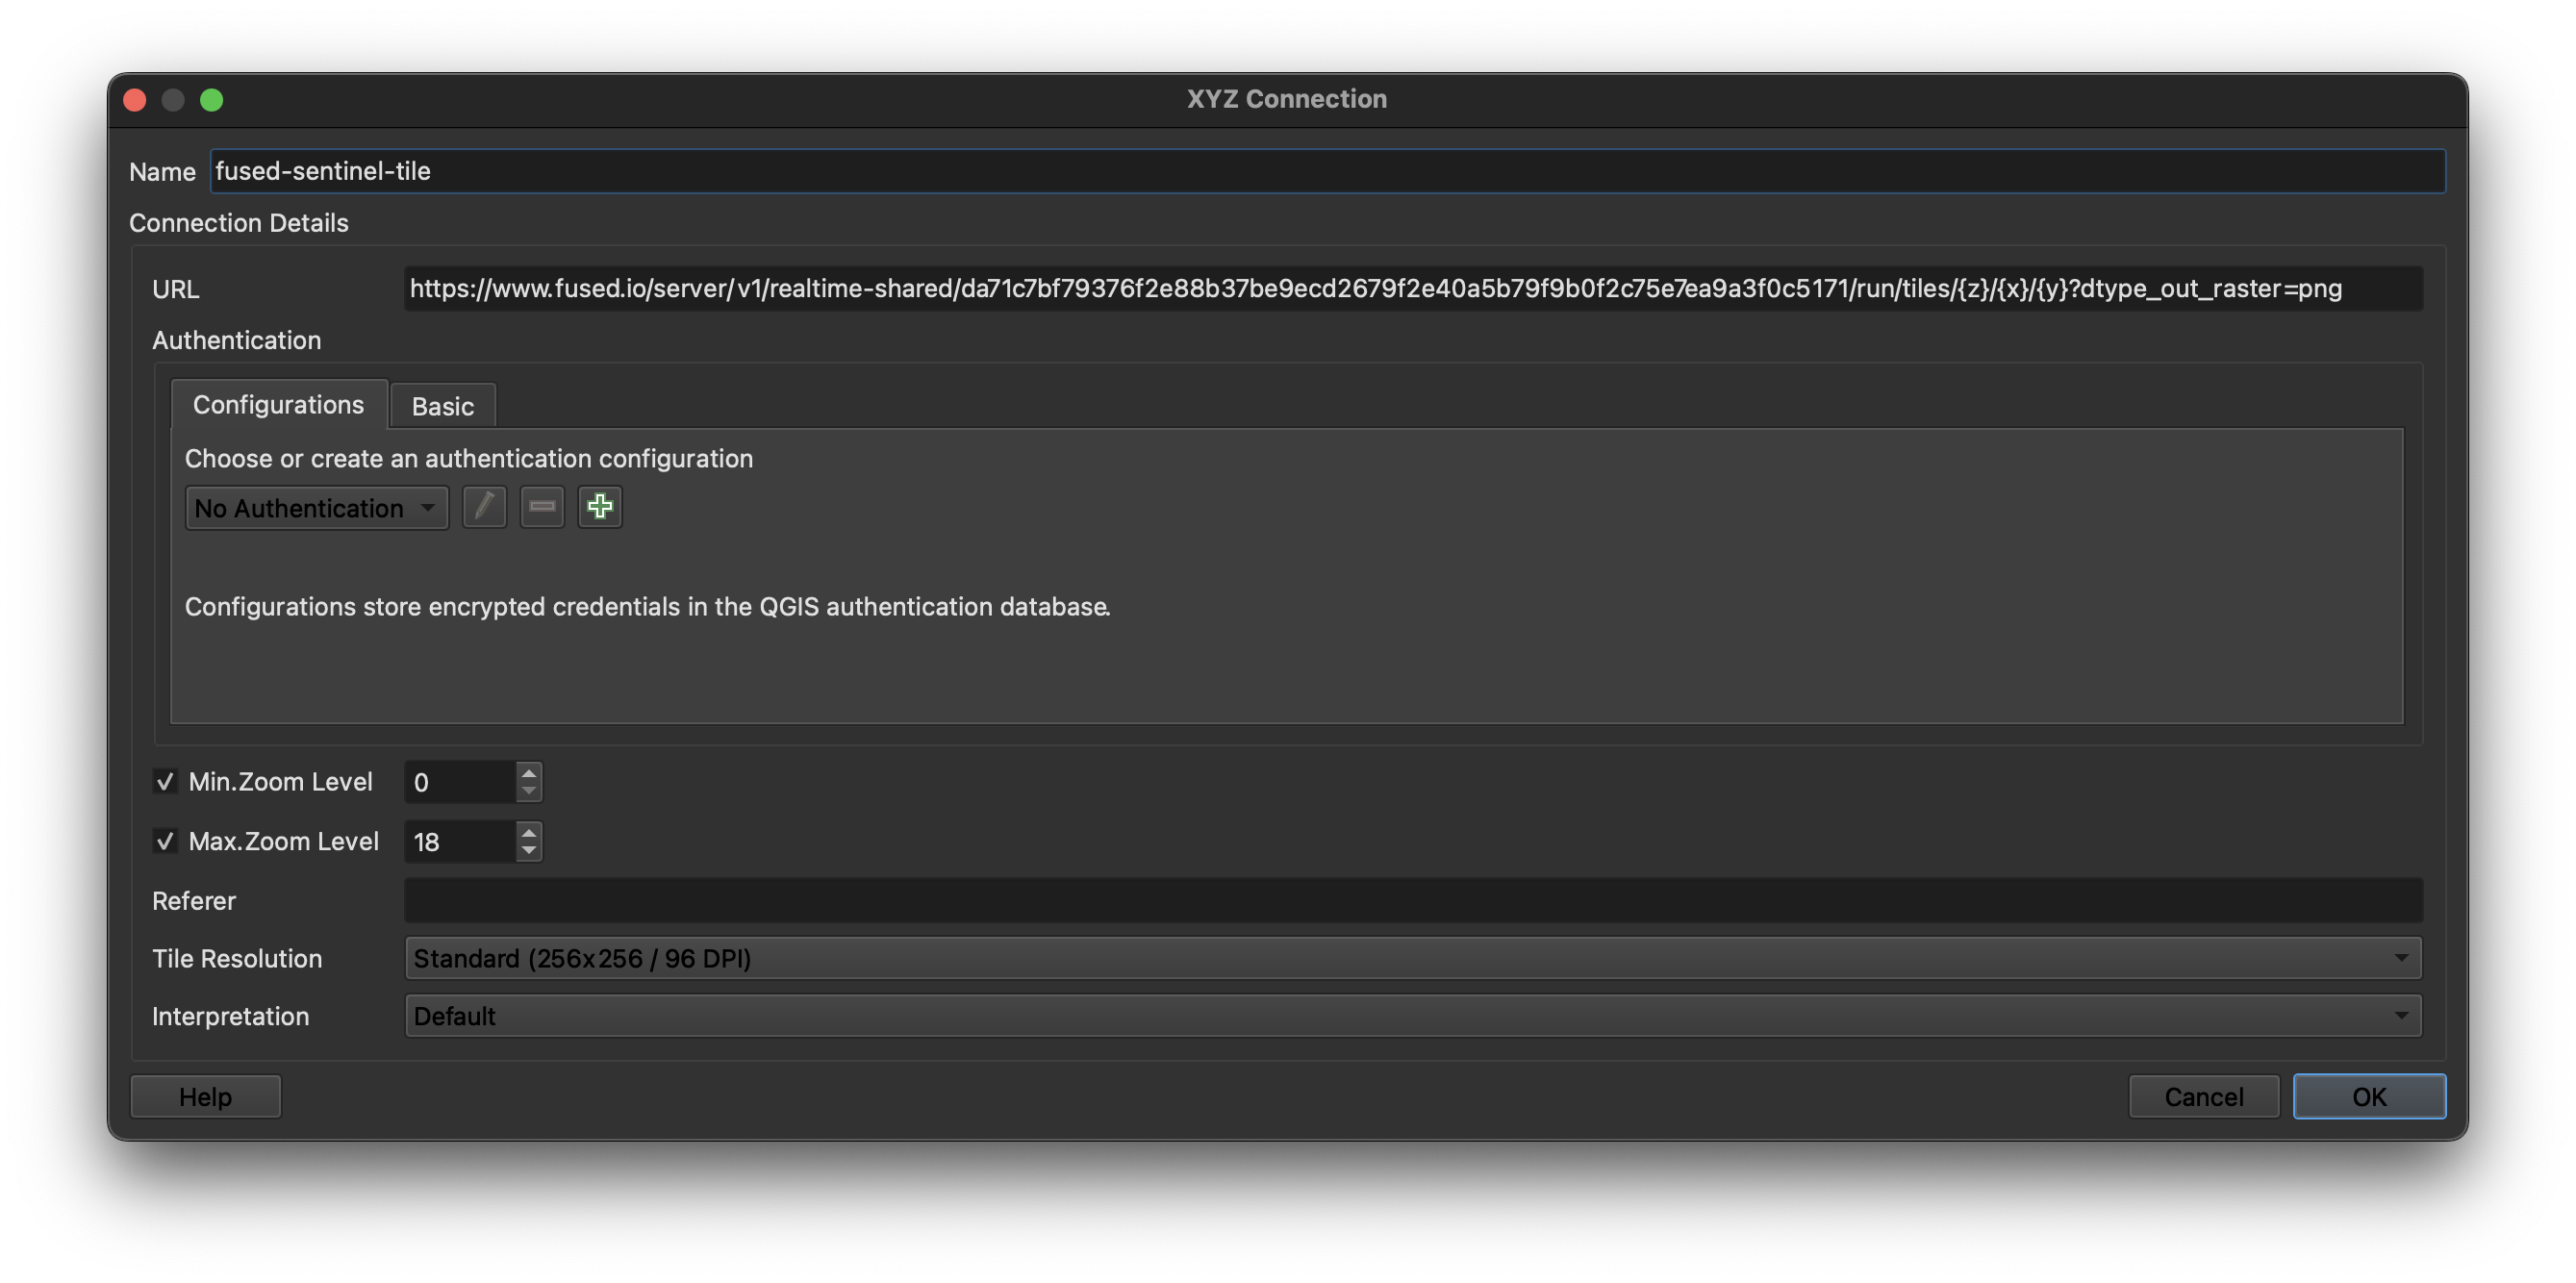
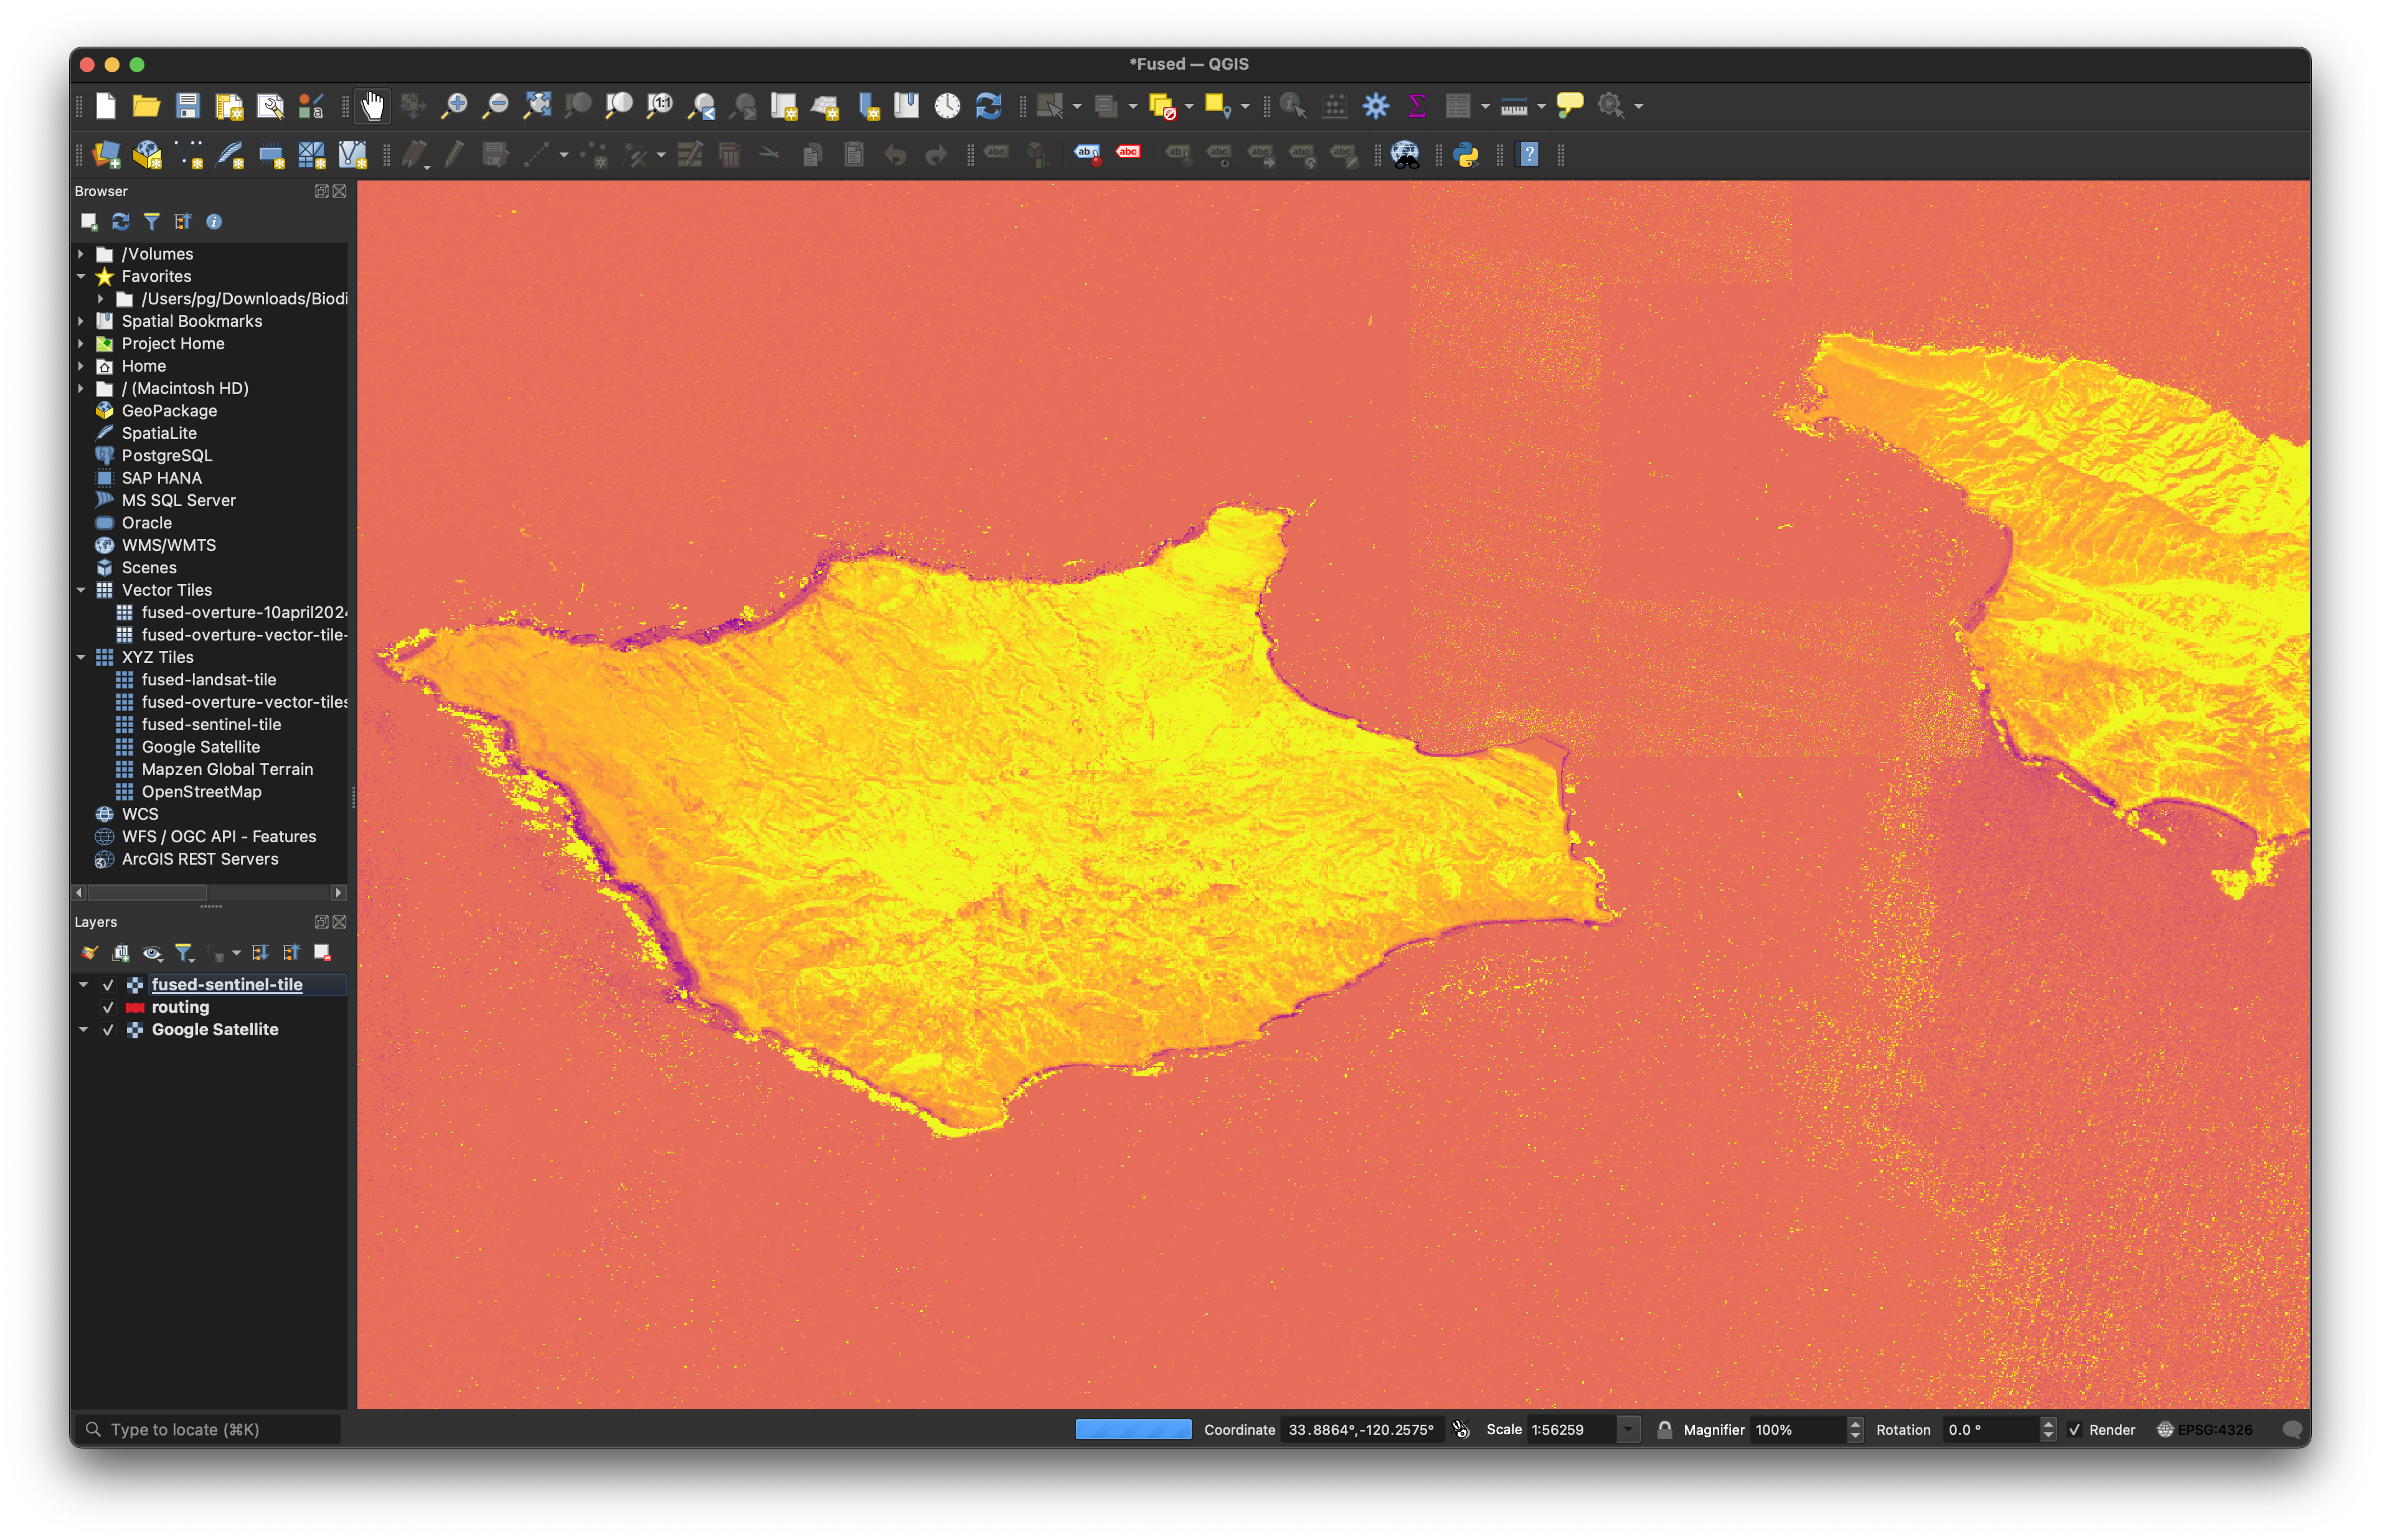
This should render the raster output tiles on the map. This example shows NDVI in the area surrounding Santa Rosa Island, off the coast of Southern California.
Note that the QGIS client is liable to timeout errors if it encounters a high number of concurrent requests and might show a warning similar to this one. Issues generally resolve after waiting some time.
2024-04-12T12:10:06 WARNING Network request https://www.fused.io/server/v1/realtime-shared/da71c7bf79376f2e88b37be9ecd2679f2e40a5b79f9b0f2c75e7ea9a3f0c5171/run/tiles/14/2722/6554?dtype_out_raster=png timed out`
Vector Tiles (Streamed data)
Load large vector files as tiles. This is helpful to stream Tile UDF
You can follow QGIS instructions here
We'll use the Overture Maps Example public UDF as an example:
- In the "Share page" for the UDF, set
dtype_out_vectortomvt:
https://www.fused.io/server/v1/realtime-shared/UDF_Overture_Maps_Example/run/tiles/{z}/{x}/{y}?dtype_out_raster=png&dtype_out_vector=geojson
(Make sure the tiles are set to {z}/{x}/{y}? so QGIS can load the data as you pan around)
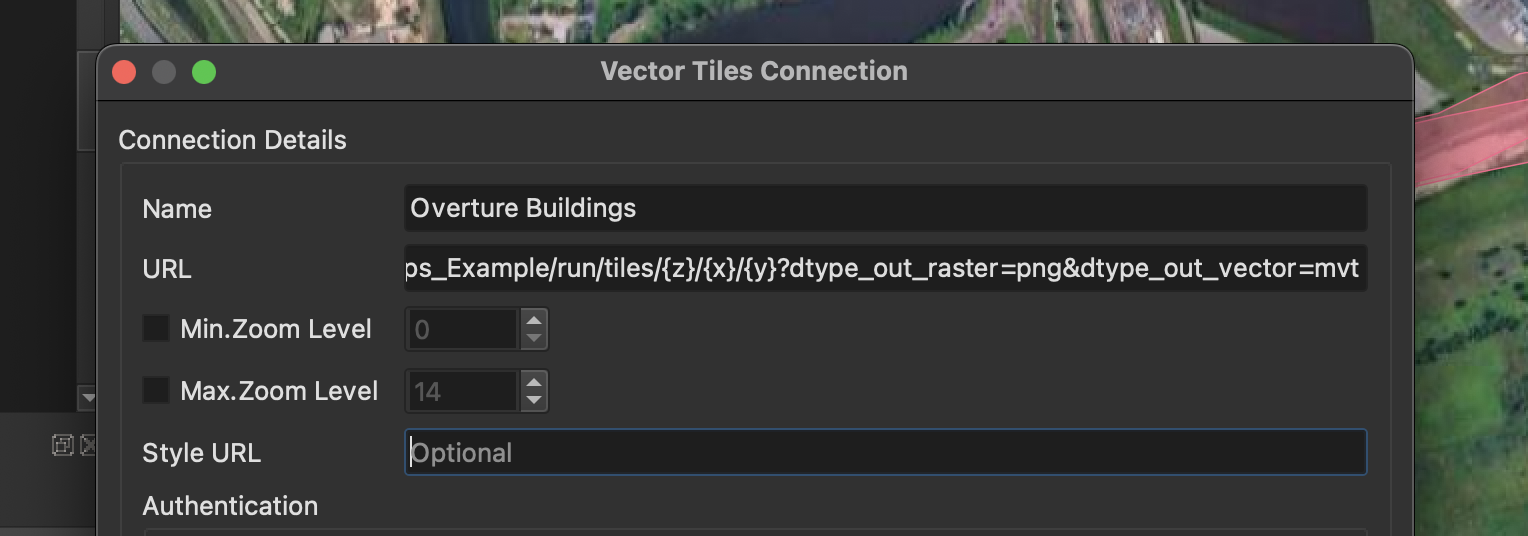
- In QGIS create a new "Vector Tiles" layer by right-clicking:
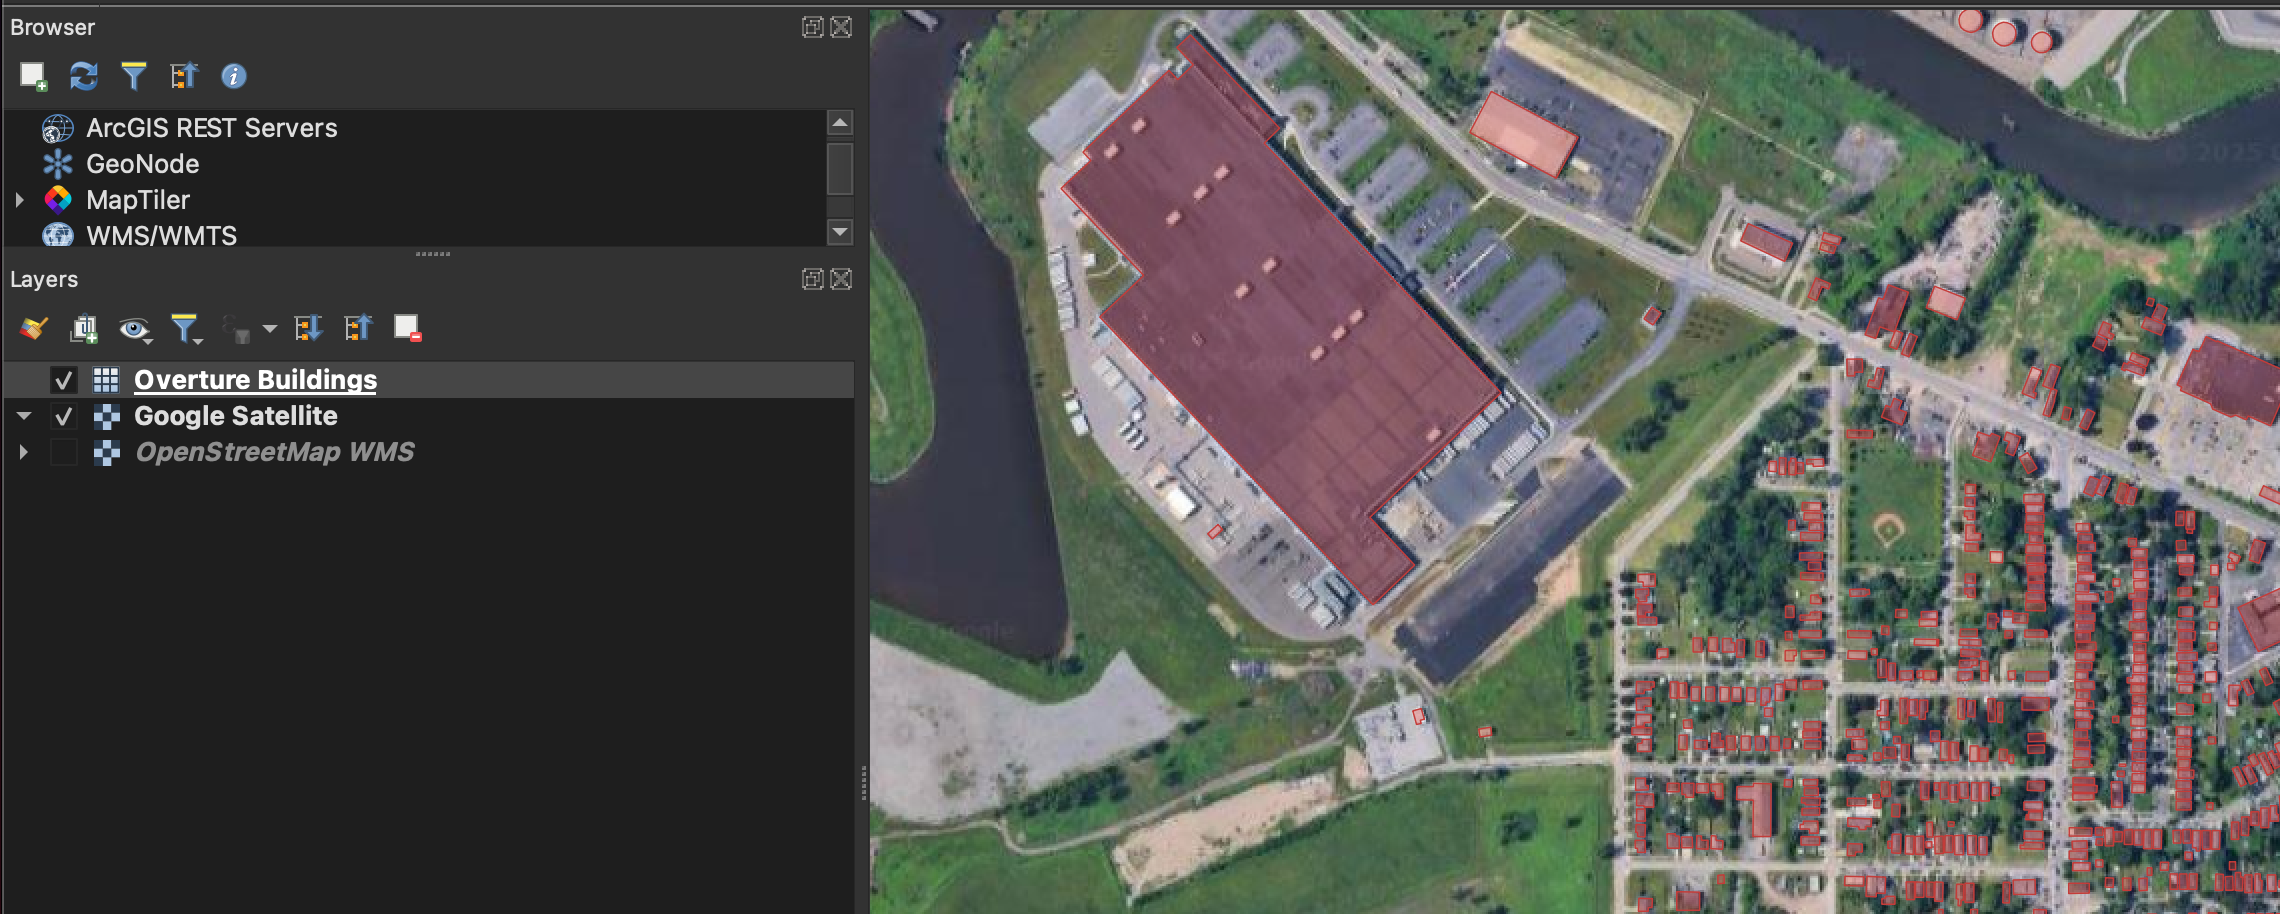
Vector Tiles->New Connection. Now paste the UDF URL in the URI field and configure the layer as shown. - Load the layer in QGIS and stat panning around!
Vector File (Small file)
Load vector data onto the QGIS map.
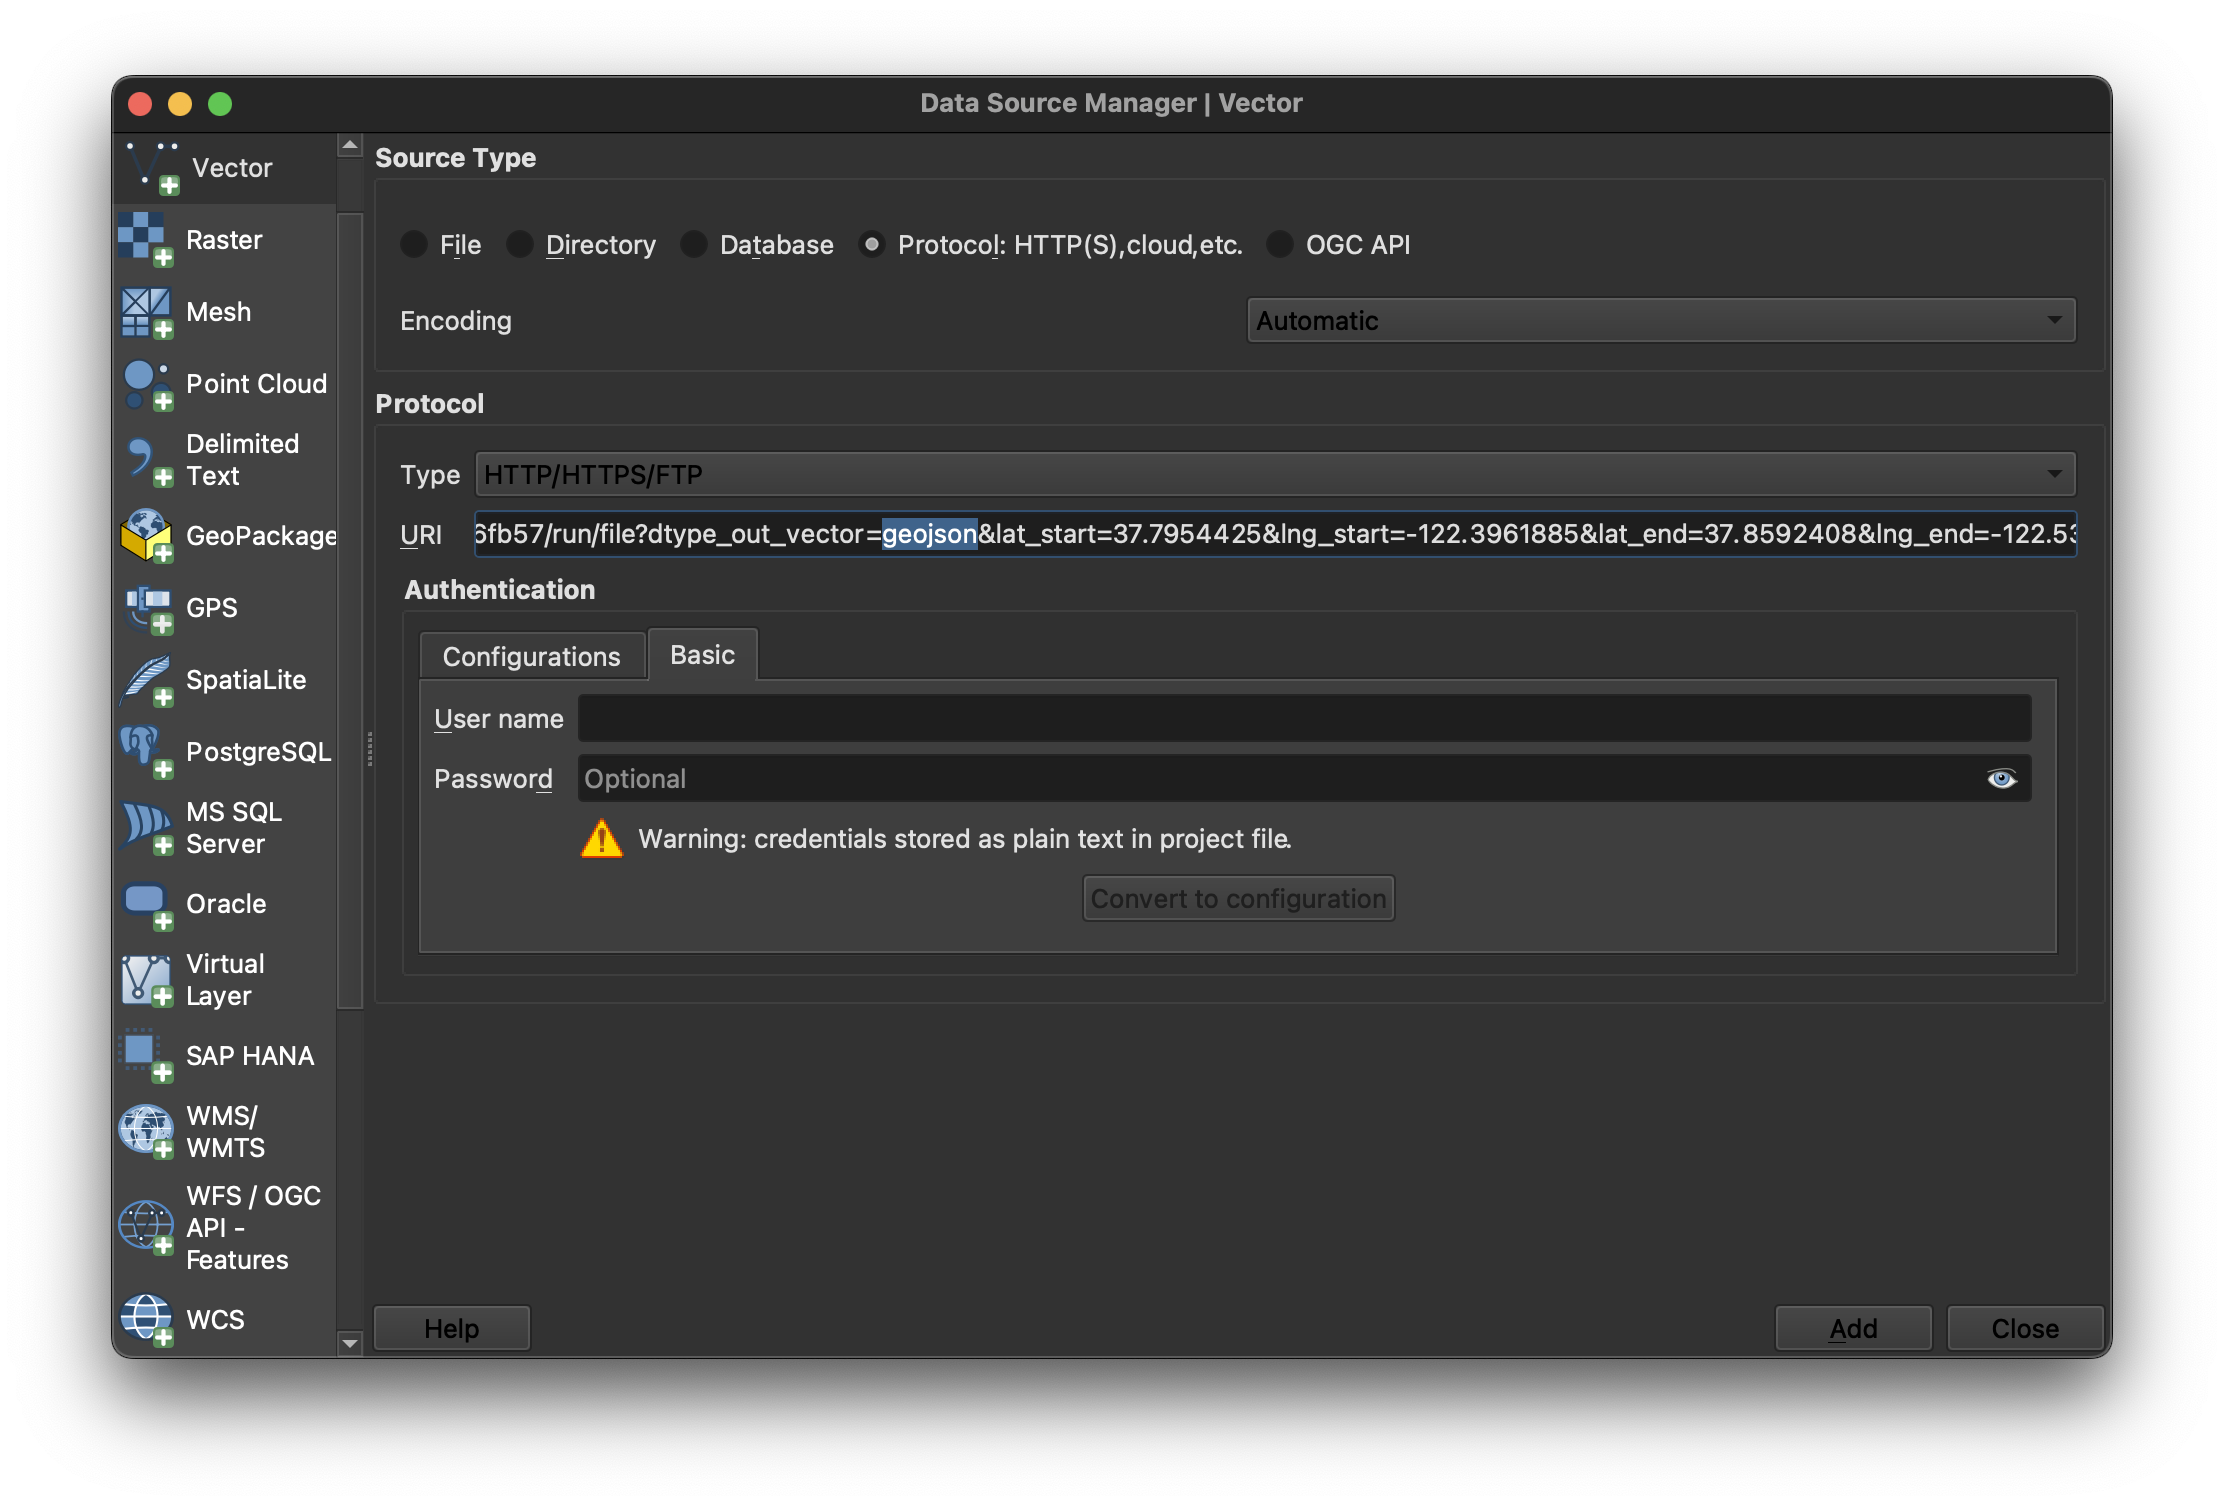
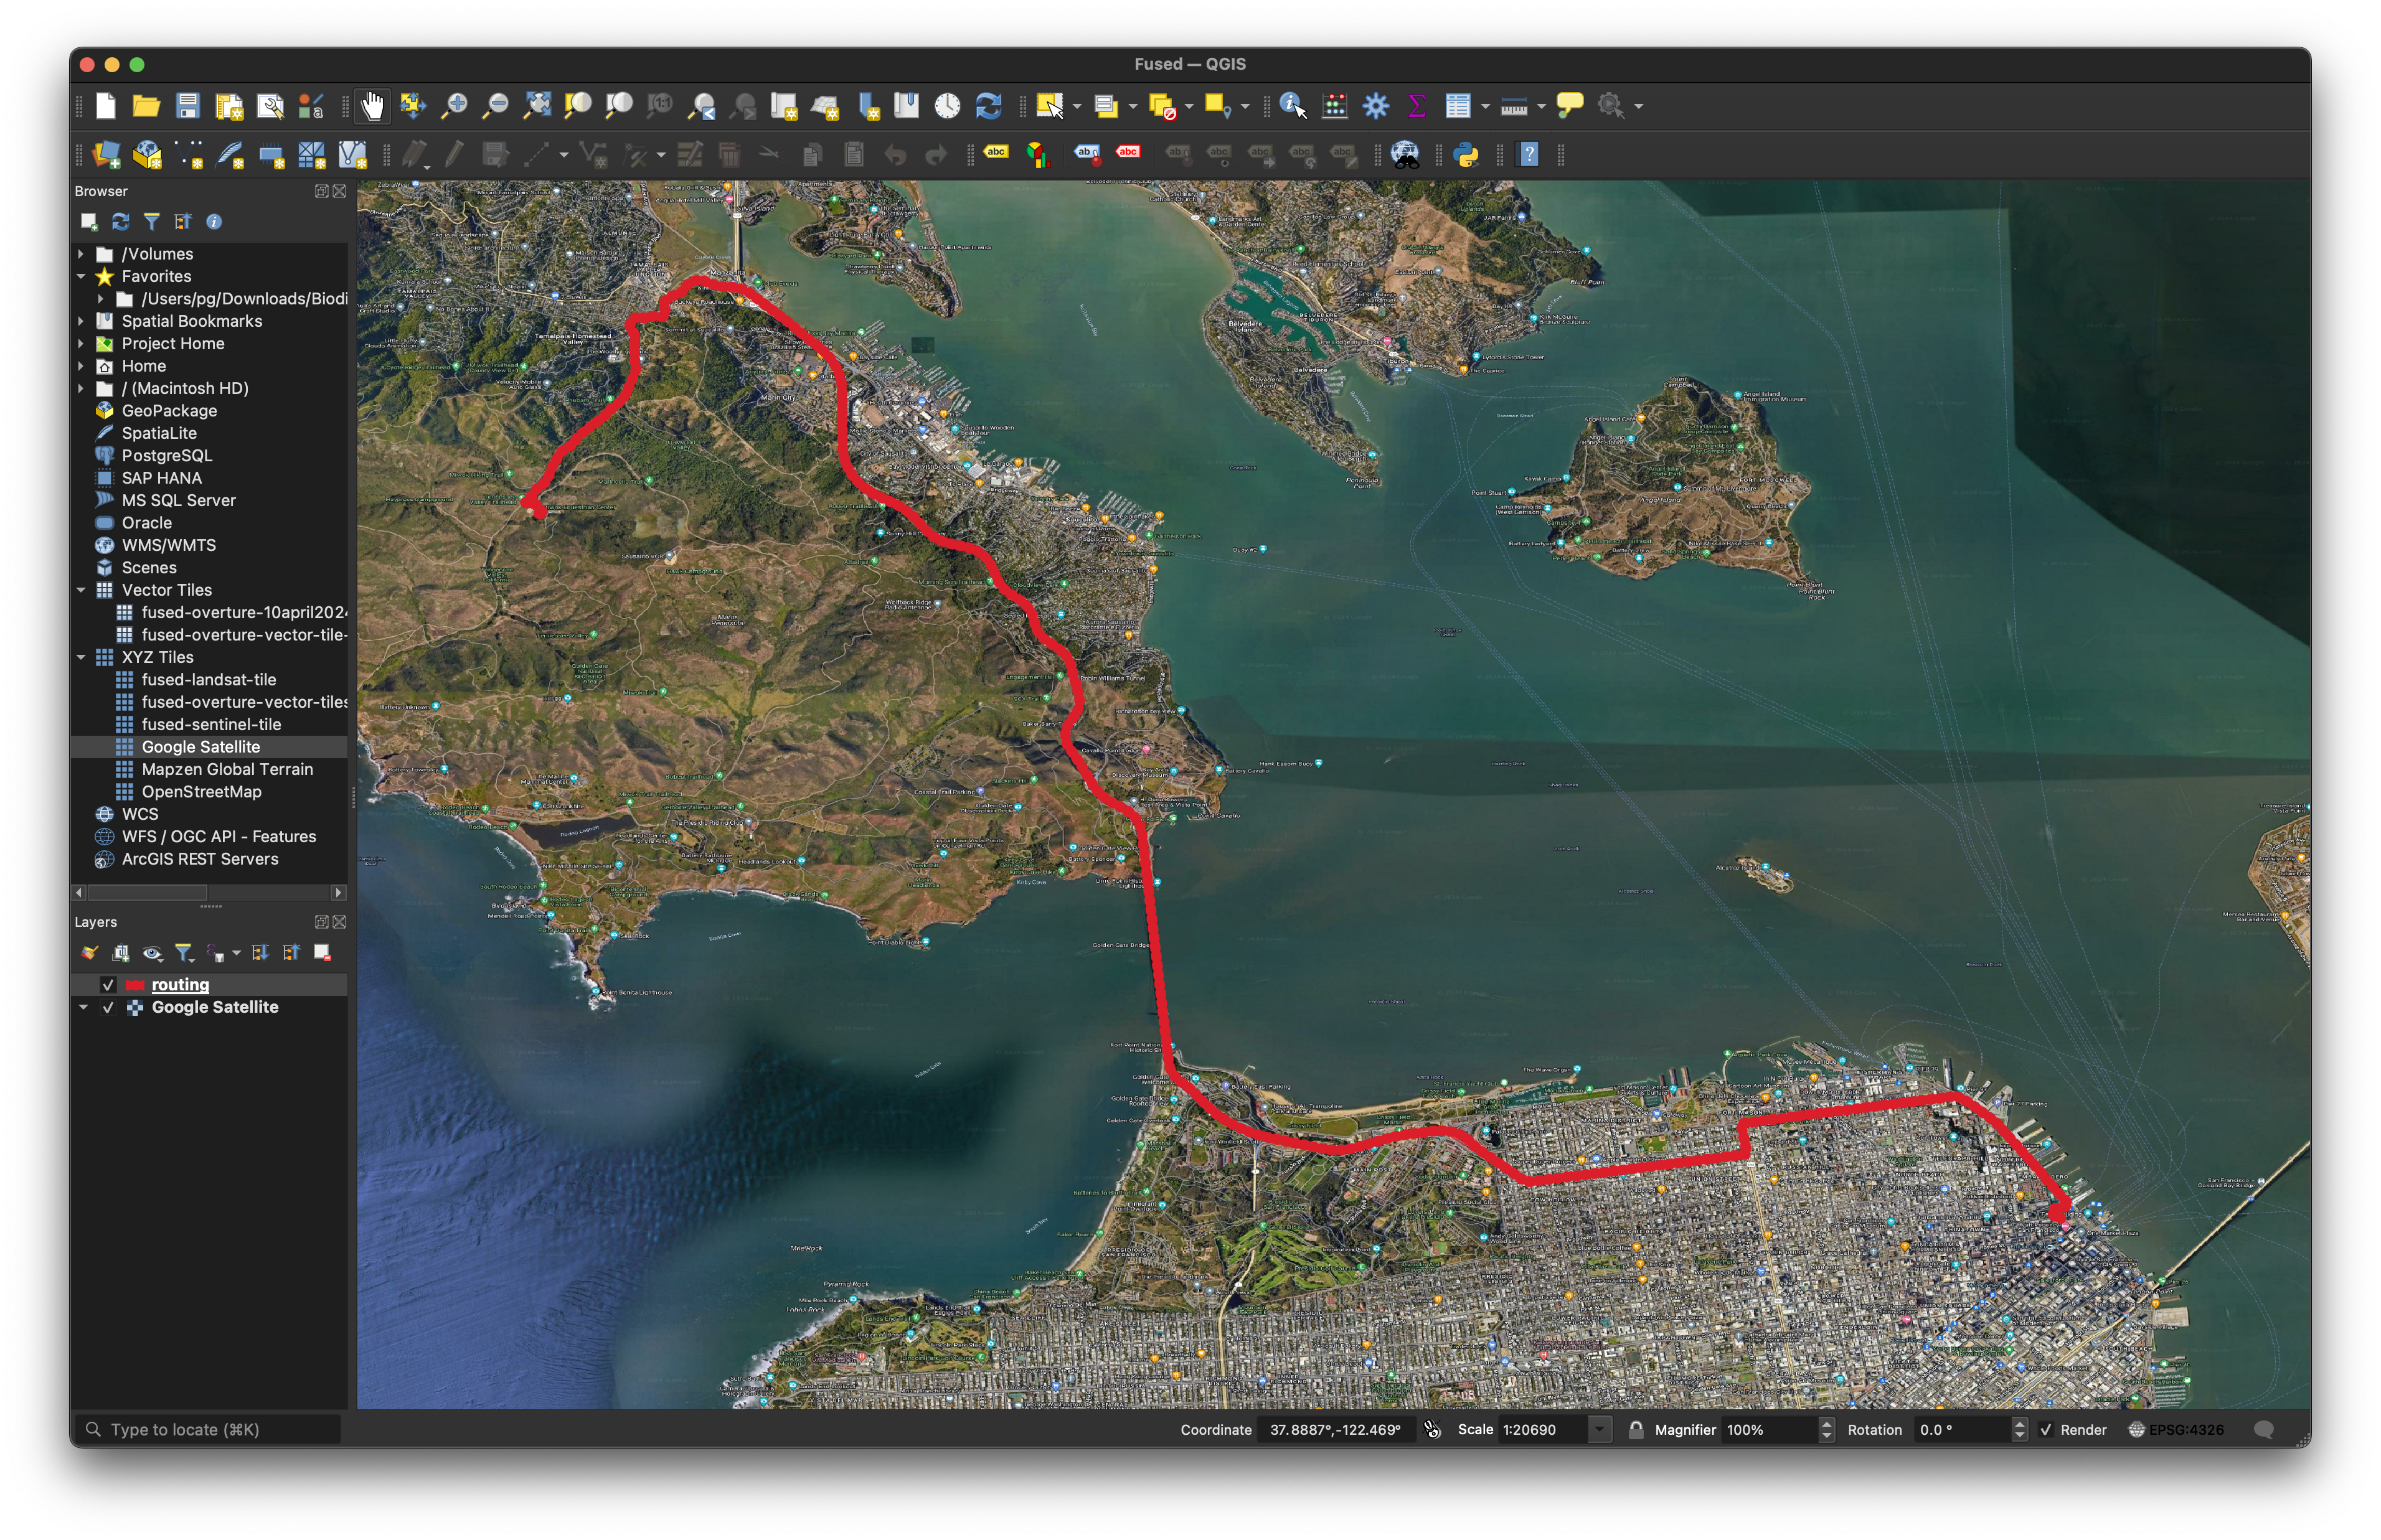
As an example, the "Single Route" public UDF returns a composite vector line of driving directions between an origin and destination locations. Create a new instance of it on your workbench, generate a shared URL, and then modify the URL query parameters:
- Set
dtype_out_vectortogeojson. - Set UDF parameters as needed.
For example:
https://www.fused.io/server/v1/realtime-shared/4f8fe6b81811ce011d7045b9fffbcfb43663637a4c626955821566fe62e6fb57/run/file?dtype_out_vector=csv&lat_start=37.7954425&lng_start=-122.3961885&lat_end=37.8592408&lng_end=-122.5349321
Open the modal to create a new vector layer by clicking: Layer -> New Layer -> Add Vector Layer. Now paste the UDF URL in the URI field and configure the layer as shown.
This should load the data and render it on the map.
Note that QGIS might cache the response of endpoint calls, which means UDF changes might not propagate immediately.