Exploring Maxar Open Data
A guide showing how to use Fused to get all of Maxar's Open Data from all the available STAC catalogs and explore the imagery
Requirements
Summary
Maxar, the high resolution satellite image company, offers some of their data in the open specifically for following natural disaster. This data is available as a series of STAC Catalogs for each of event.
One of the limitation of this setup is that each event is its own STAC Catalog making it hard to parse through all the available Maxar open data if we were to look for specific images. While there is a STAC Browser available it still only gives us access to a single 'Event' at a time
In this in-depth Example we'll:
- Show how to use
fused.submit()to fetch all the available STAC Catalogs all at once in parallel in just a few seconds - Filter for any data we want (latest event, only cloud free images, etc.)
- Write a UDF to then visualise some of the data
Maxar's Open Data
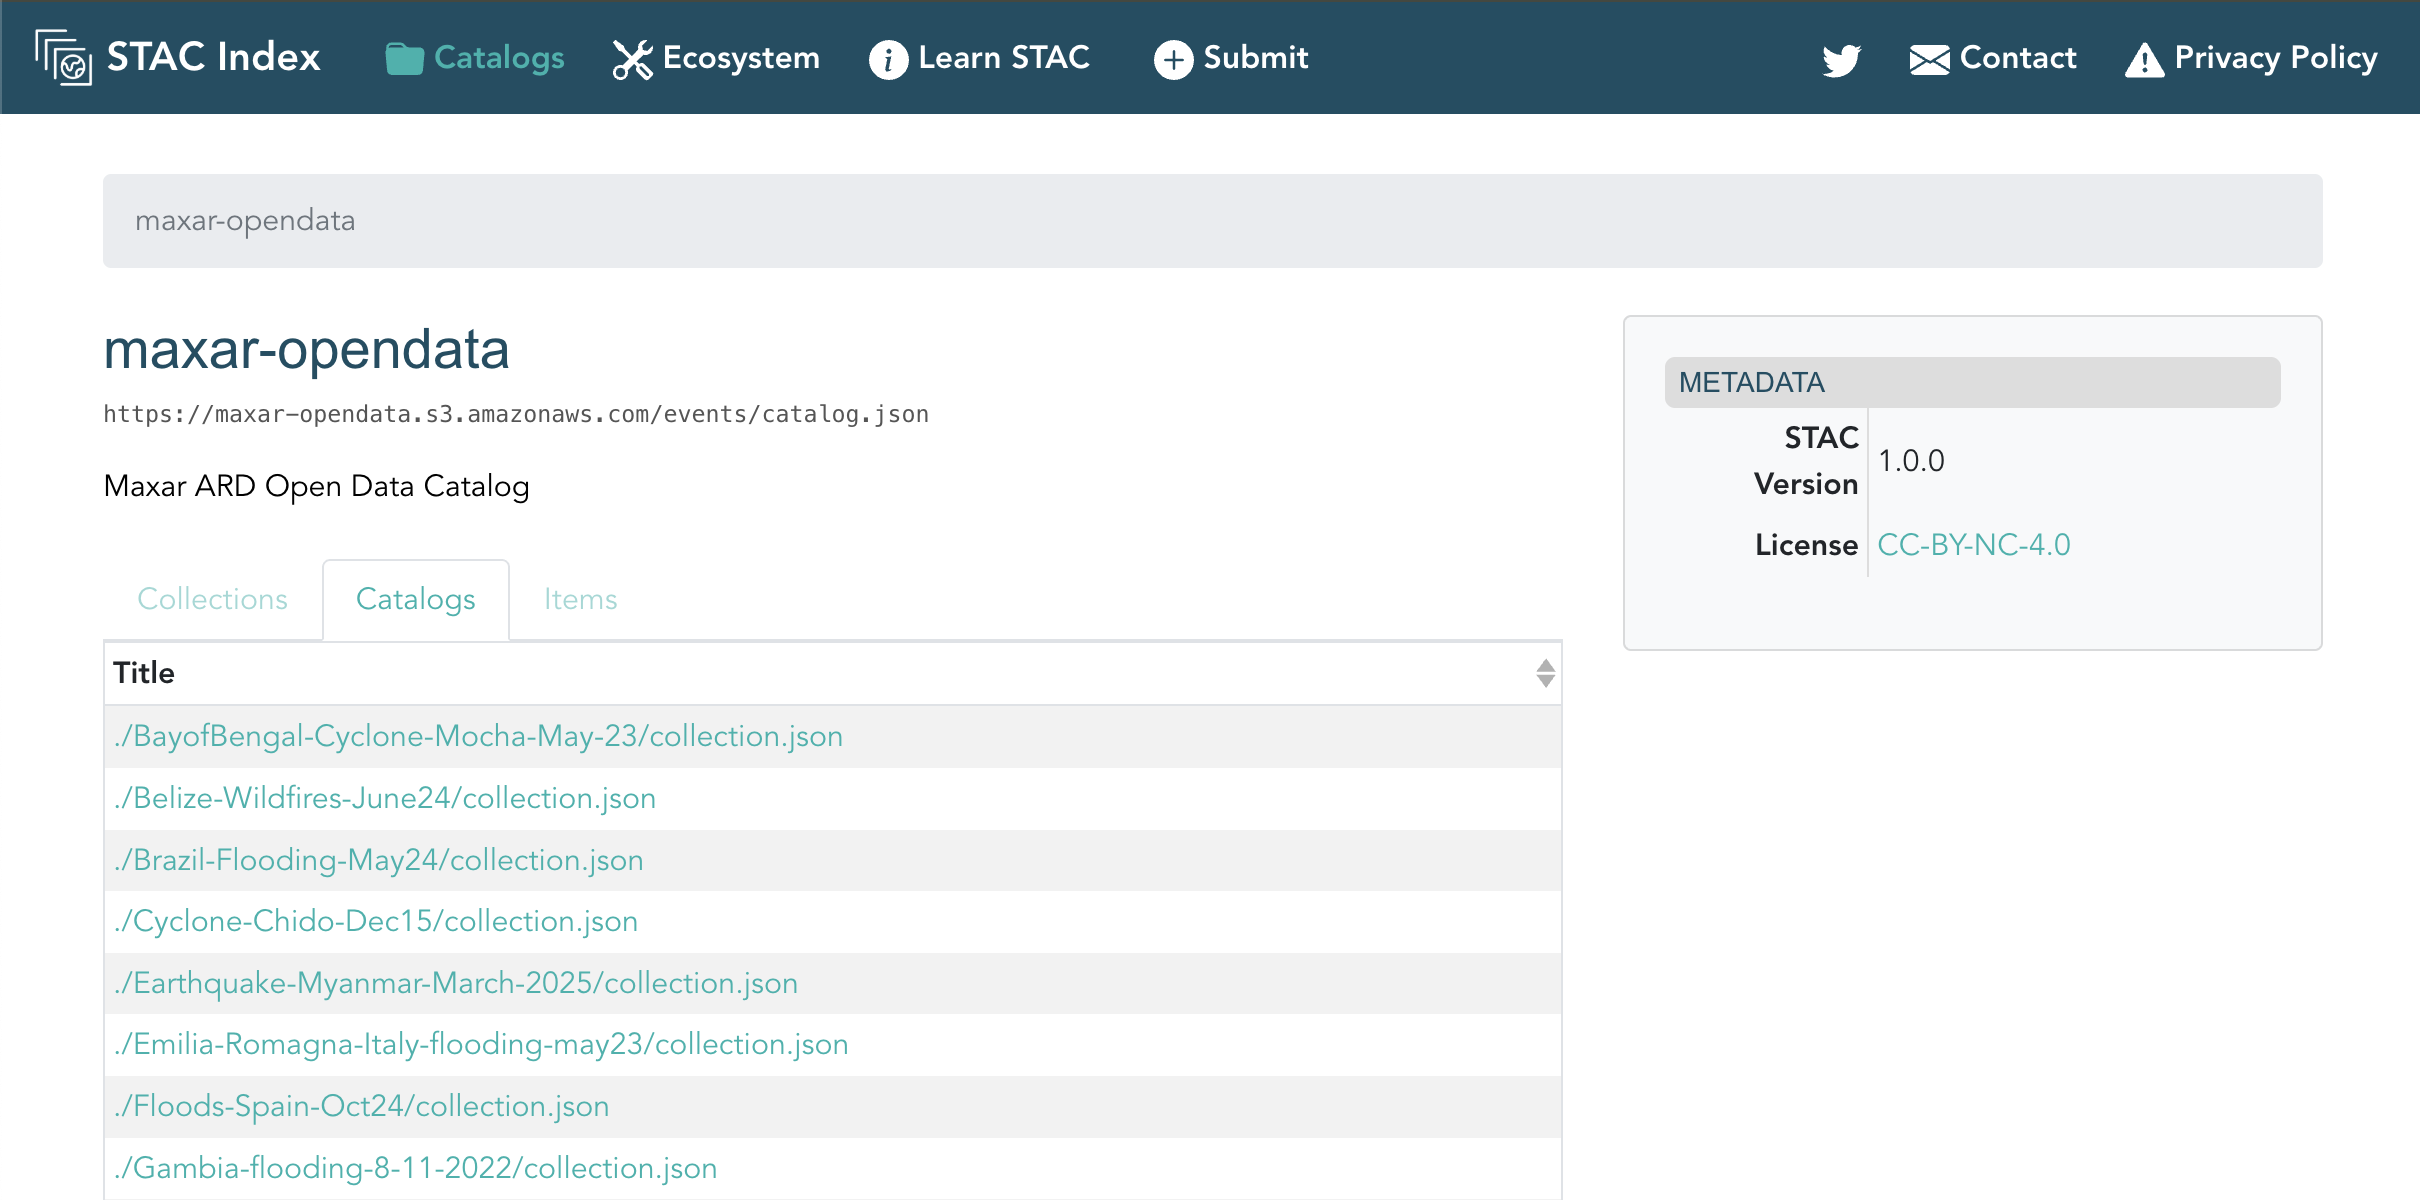
To access Maxar's Open Data we first need to understand how it's structured. After a quick Google search we find the "Maxar ARD Open Data Catalog" containing:
- A main catalog containing a list of all the events:
https://maxar-opendata.s3.amazonaws.com/events/catalog.json - Every event being under it's own
events/directory, for example:https://maxar-opendata.s3.amazonaws.com/events/BayofBengal-Cyclone-Mocha-May-23/collection.json. Eachcollectionthen contains
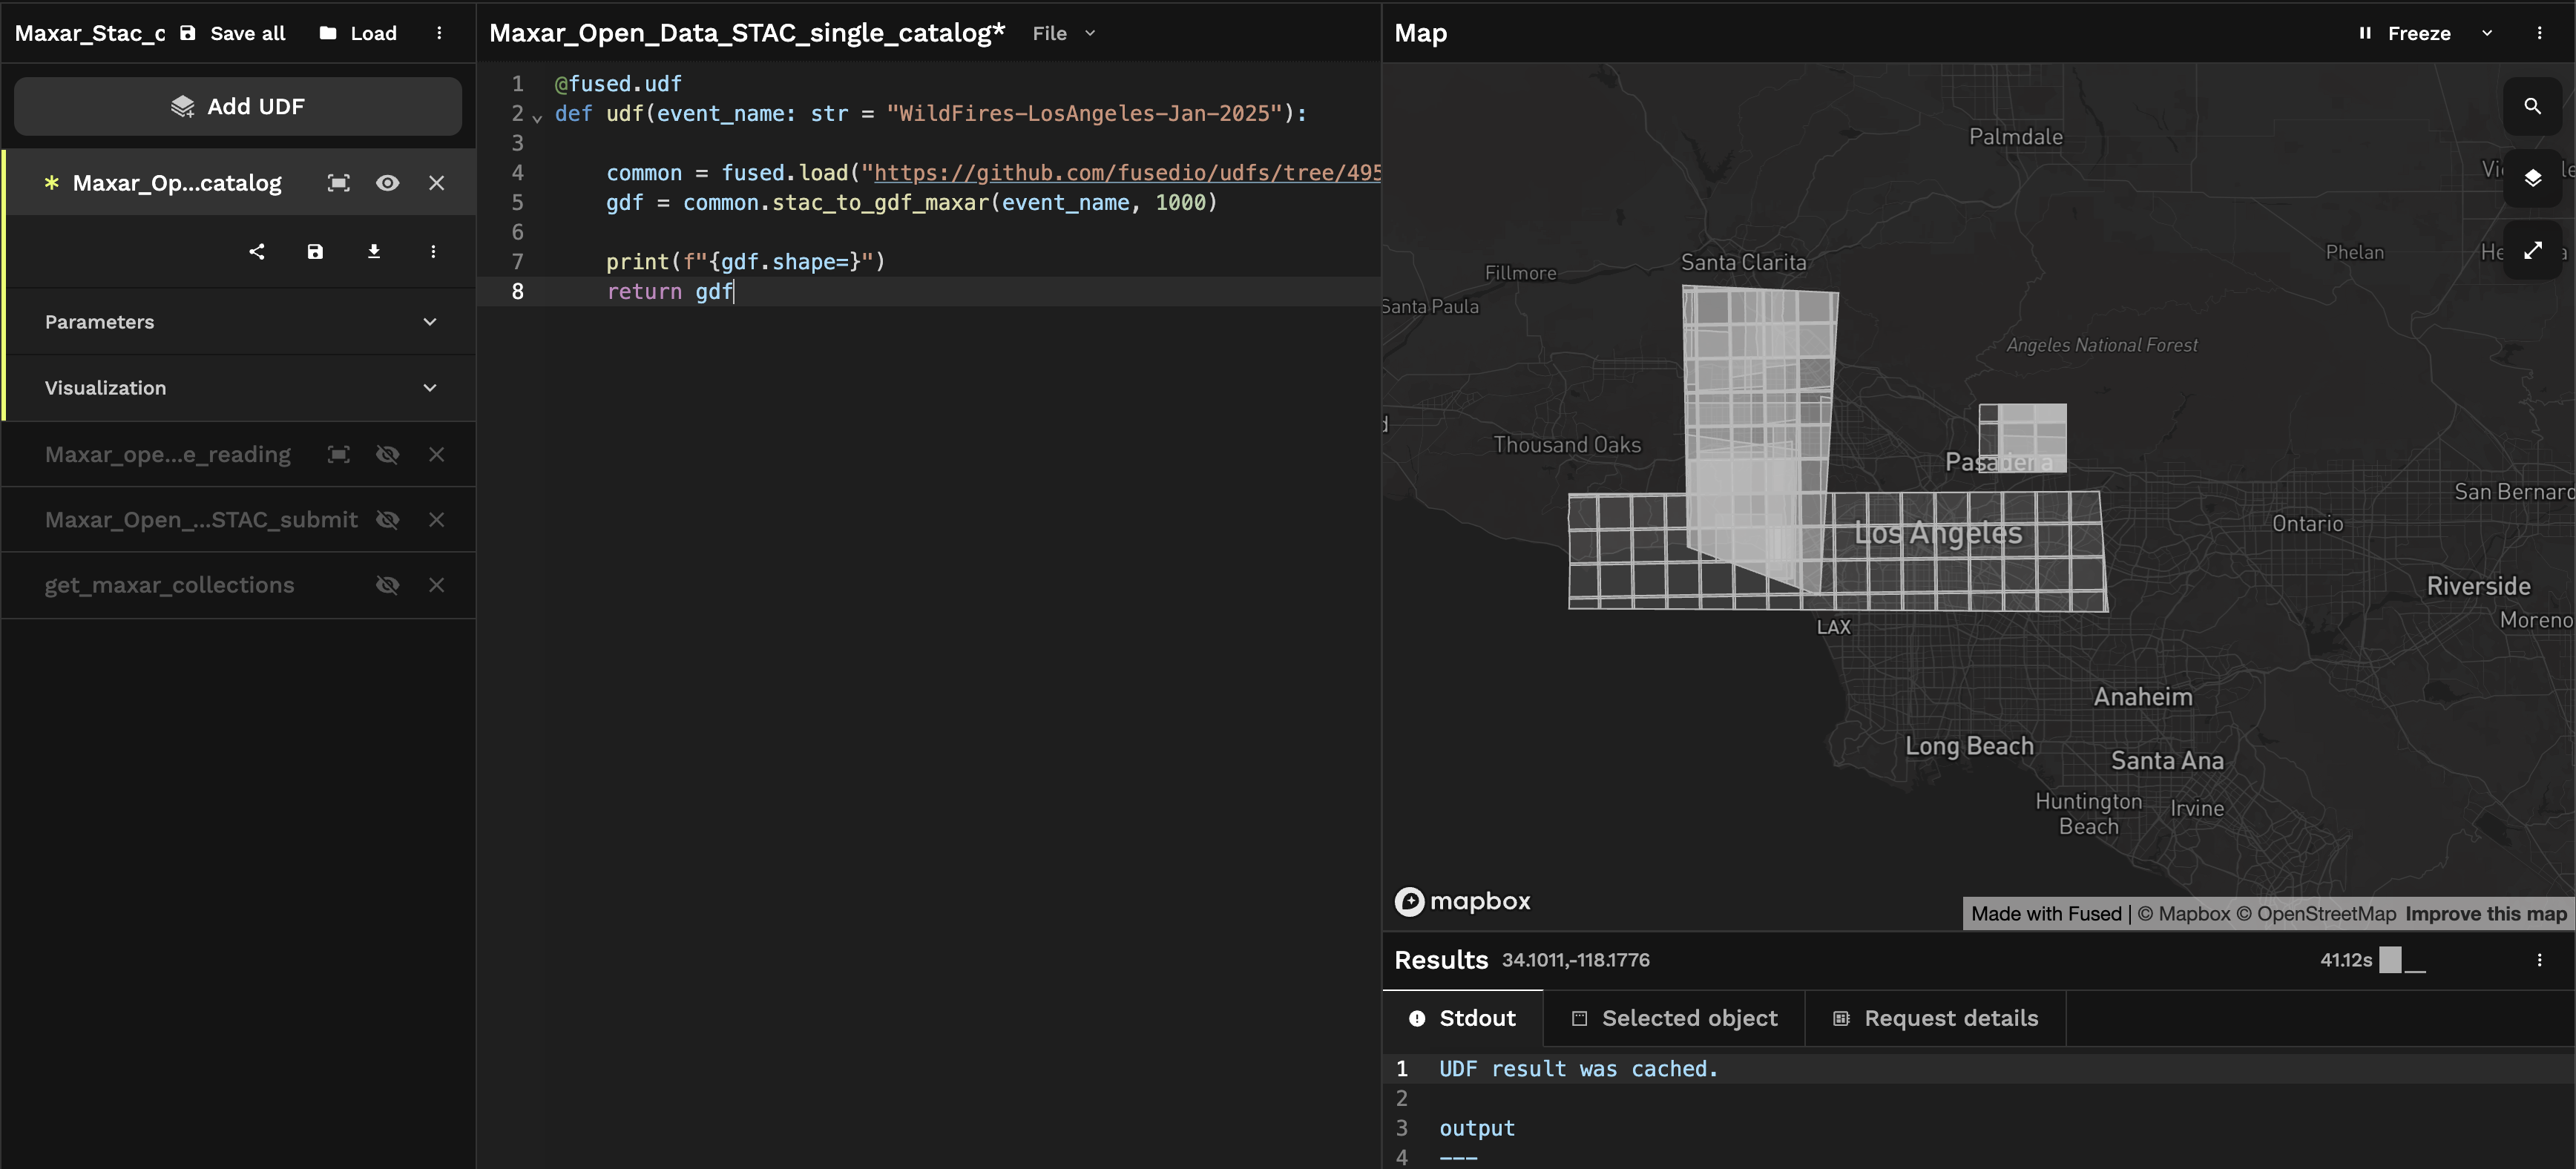
We can use Workbench to write a UDF to explore one of the collections. At the time of writing one of the most recent events is the Jan 2025 Los Angeles Wildfires:
@fused.udf
def udf(event_name: str = "WildFires-LosAngeles-Jan-2025"):

    common = fused.load("https://github.com/fusedio/udfs/tree/495e84/public/common/").utils
    gdf = common.stac_to_gdf_maxar(event_name, 1000)

    print(f"{gdf.shape=}")
    return gdf
We've abstracted away some of the logic for how to gather then STAC catalog inside a common function.
How Fused uses helper functions: looking at stac_to_gdf_maxar
Working with Fused UDFs also give you the option to easily use functions defined in other UDFs. In practice this means we've created a common public UDF that contains some functions we've found useful when working with any type of data.
You can explore it yourself by directly reading the code in Github. If you see any functions you'd like to use, we strongly recommend you use fused.load() and pass the latest commit hash at the time you want to use it:
commit_hash = "39d93ca" # Latest commit hash of https://github.com/fusedio/udfs/blob/main/public/common/utils.py at time of writing
common = fused.load(f"https://github.com/fusedio/udfs/tree/{commit_hash}/public/common/").utils
Each Maxar Event itself contains multiple collections. We created a simple function that loops over all the available UNIQUE_ID/collection.json, reads them an appends them into a single GeoDataFrame:
Looking at the WildFires-LosAngeles-Jan-2025/collections.json file:
{
    "type": "Collection",
    "id": "WildFires-LosAngeles-Jan-2025",
    "stac_version": "1.0.0",
    "links": [
        {"rel": "root","href": "../collection.json","type": "application/json"},
        {
            "rel": "child",
            "href": "./ard/acquisition_collections/103001010A705C00_collection.json",
            "type": "application/json"
        }
        {...}
    ],
    "extent": {
        "spatial": {
            "bbox": [
                [
                    -118.83595849685837,
                    33.94834763200993,
                    -117.96801495199365,
                    34.38301736
                ],
                [
                    -118.65050916791418,
                    34.1935474876183,
                    -118.46364201282341,
                    34.33393673056412
                ],
                [...]
            ]
        },
        "temporal": {"interval": [["2024-12-14 18:39:04Z","2025-01-20 18:32:44Z"]]}
    },
    "title": "Los Angeles Wildfires 2025",
    "description": "Driven by strong Santa Ana winds, multiple wildfires are burning in the Los Angeles, California, area. More than 40,000 acres and more than 12,300 structures have burned; at least 19 people have died.",
    "license": "CC-BY-NC-4.0"
}
So we create stac_to_gdf_maxar to:
- Loop over all the
UNIQUE_ID/collection.jsonfiles - Read each
collection.jsonfile - Extract the metadata & extent of each collection
- Convert the
extentinto a GeoDataFrame - Concat all into a single GeoDataFrame
Once again, you can directly read the code in Github to see exactly how we do this
You can easily rename your UDFs in Workbench. Rename this UDF to Maxar_Open_Data_STAC_single_catalog so we can call it later directly by name.
Make sure to save your UDF with Cmd + S (or Ctrl + S on Windows / Linux) or in the Workbench UI for these changes to take effect.
And here we get all the images for the Los Angeles Wildfires 2025 event:
Aggregating all available data
Getting all events
To be able to explore all of Maxar's Open Data Program we now need to run this specific UDF over all the available events.
We'll do this in 2 steps:
- Fetch all the event names
- Use
fused.submit()to fetch all the STAC Collections for each event name
@fused.udf
def udf():
    import pandas as pd
    from pystac import Catalog

    @fused.cache
    def getting_stac_collection(stac_url = "https://maxar-opendata.s3.amazonaws.com/events/catalog.json"):
        root_catalog = Catalog.from_file(stac_url)
        collections = root_catalog.get_collections()
        return [collection.id for collection in collections]

    collections = getting_stac_collection()
    print(f"{collections[:5]=}")

    return collections
Let's break this UDF down:
- We're using
@fused.cacheto cache the Catalog request so our UDF doesn't need to do this request each time we execute it. It prevents being rate limited and doing the same request over and over against the same endpoint - We're returning a list (
collections) so if you run this in Workbench you'll notice nothing shows up on the map! That's also why we print the first 5 rows.
Read through the Best Practices for more handy tips on how to write efficient and easy to debug UDFs
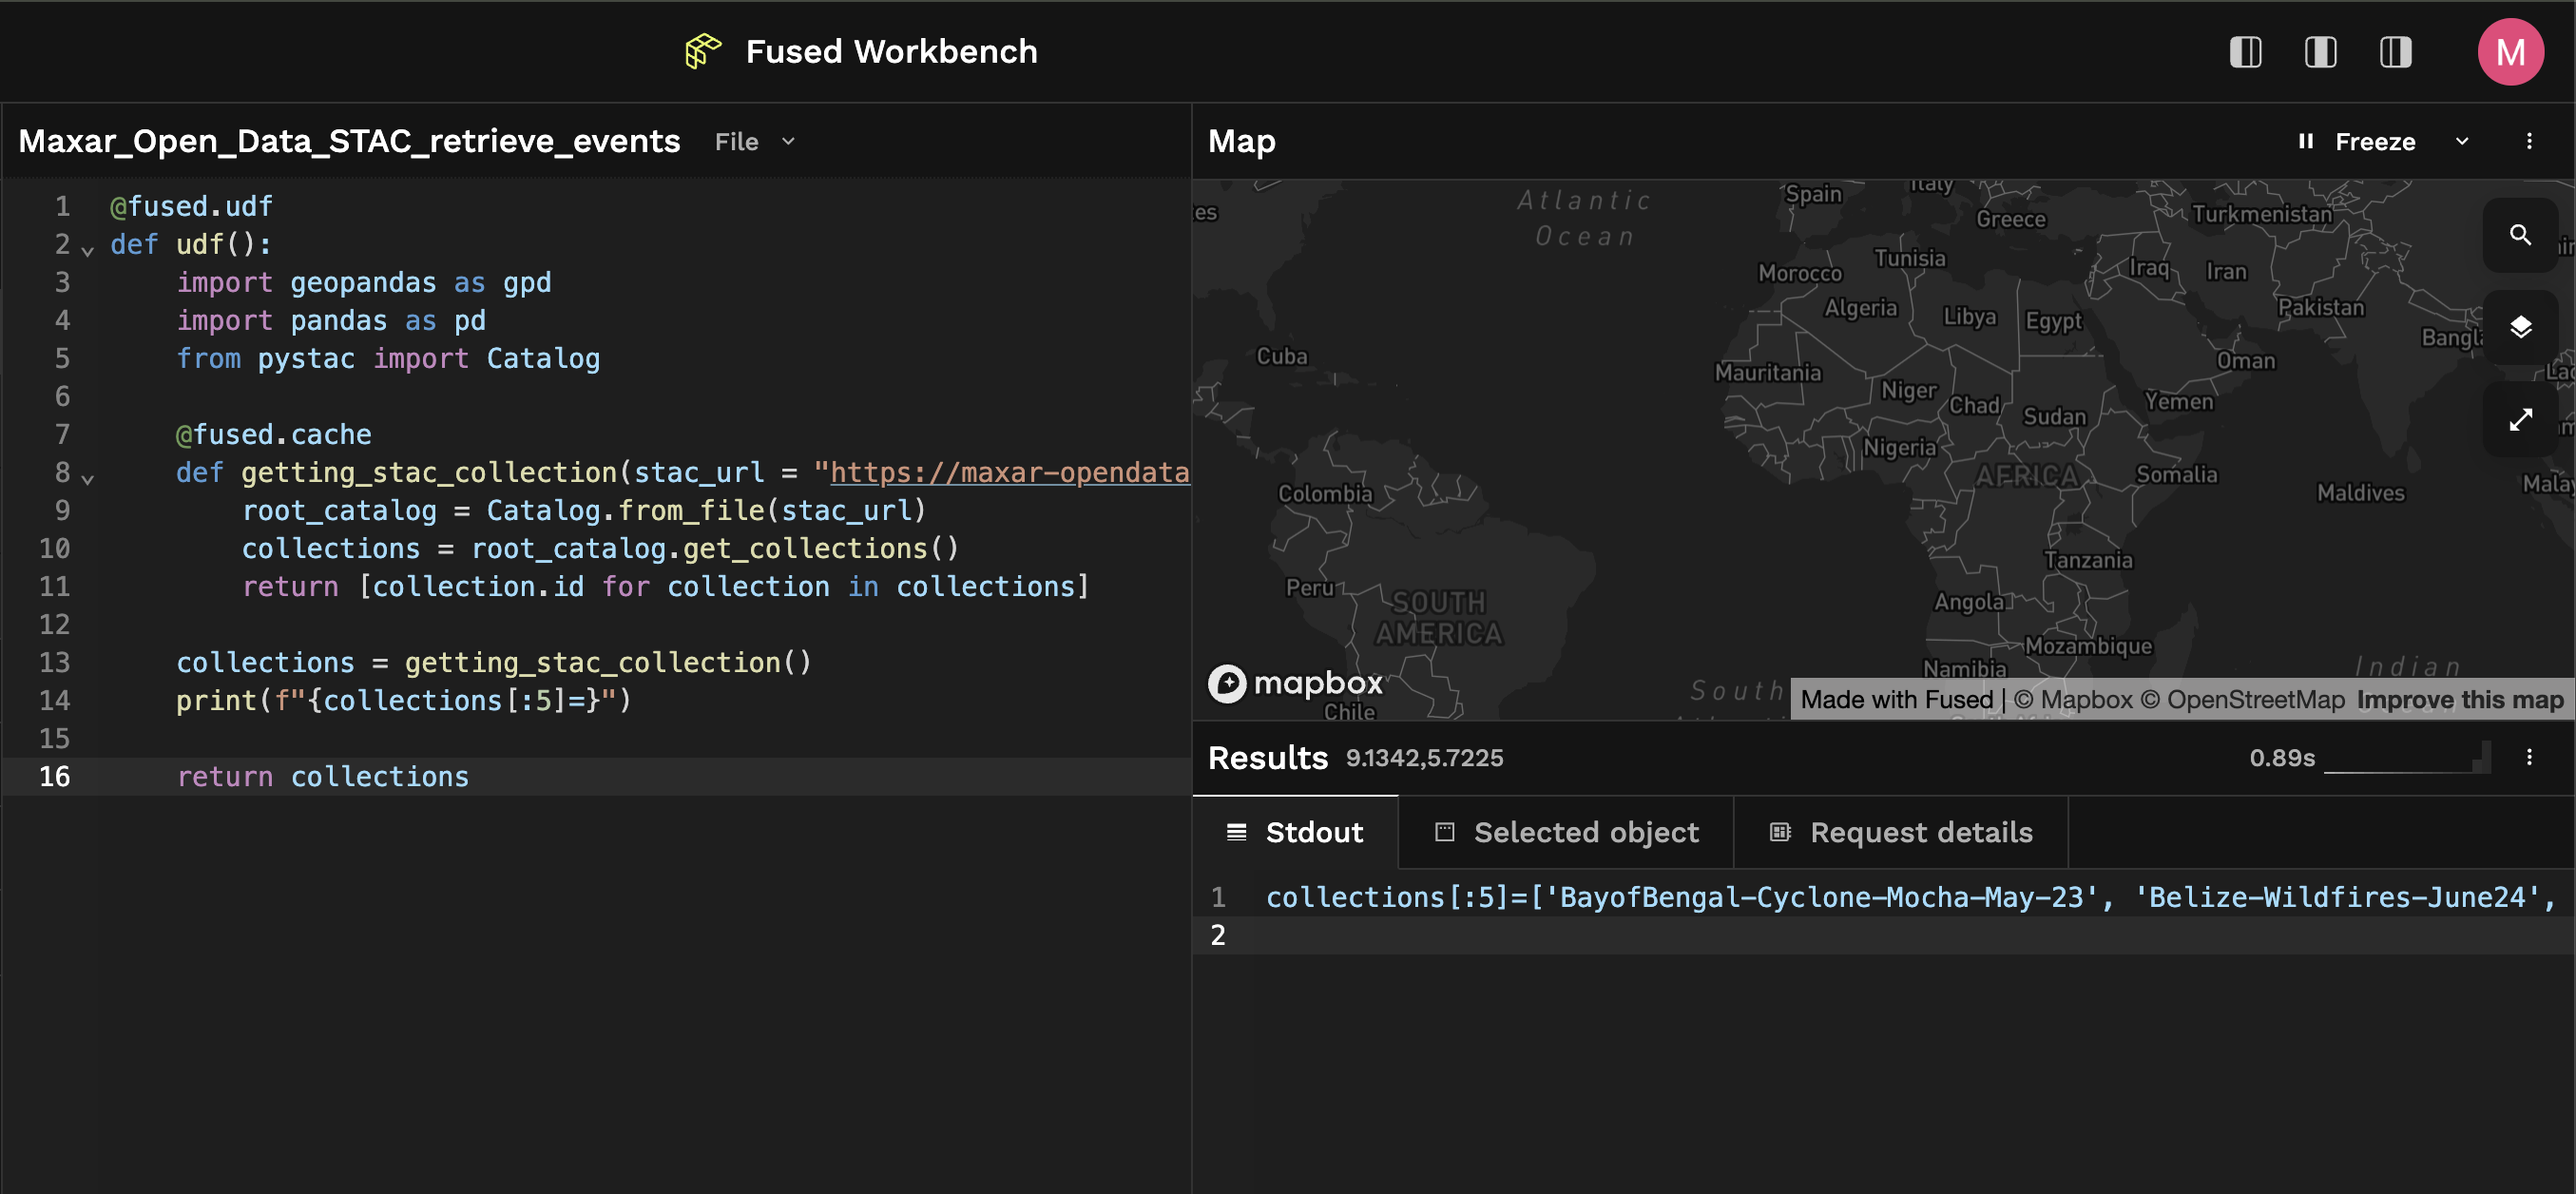
This UDF returns a list of all the available event names currently accessible through Maxar's Open STAC Catalog:
>>> print(f"{collections[:5]=}")
['BayofBengal-Cyclone-Mocha-May-23', 'Belize-Wildfires-June24', 'Brazil-Flooding-May24', 'Cyclone-Chido-Dec15', 'Earthquake-Myanmar-March-2025']
Preparing fused.submit() to run in parallel
We're going to use fused.submit() to run our first UDF in parallel. To do this we need a few things:
- Prepare our inputs (in this case the name of all the
events). We recommend doing this as a dataframe as it's simple to read & work with - Pass our first UDF to
fused.submit()
@fused.udf
def udf():
import pandas as pd
from pystac import Catalog
@fused.cache
def getting_stac_collection(stac_url = "https://maxar-opendata.s3.amazonaws.com/events/catalog.json"):
root_catalog = Catalog.from_file(stac_url)
collections = root_catalog.get_collections()
return [collection.id for collection in collections]
collections = getting_stac_collection()
collections_df = pd.DataFrame({'event_name': collections})
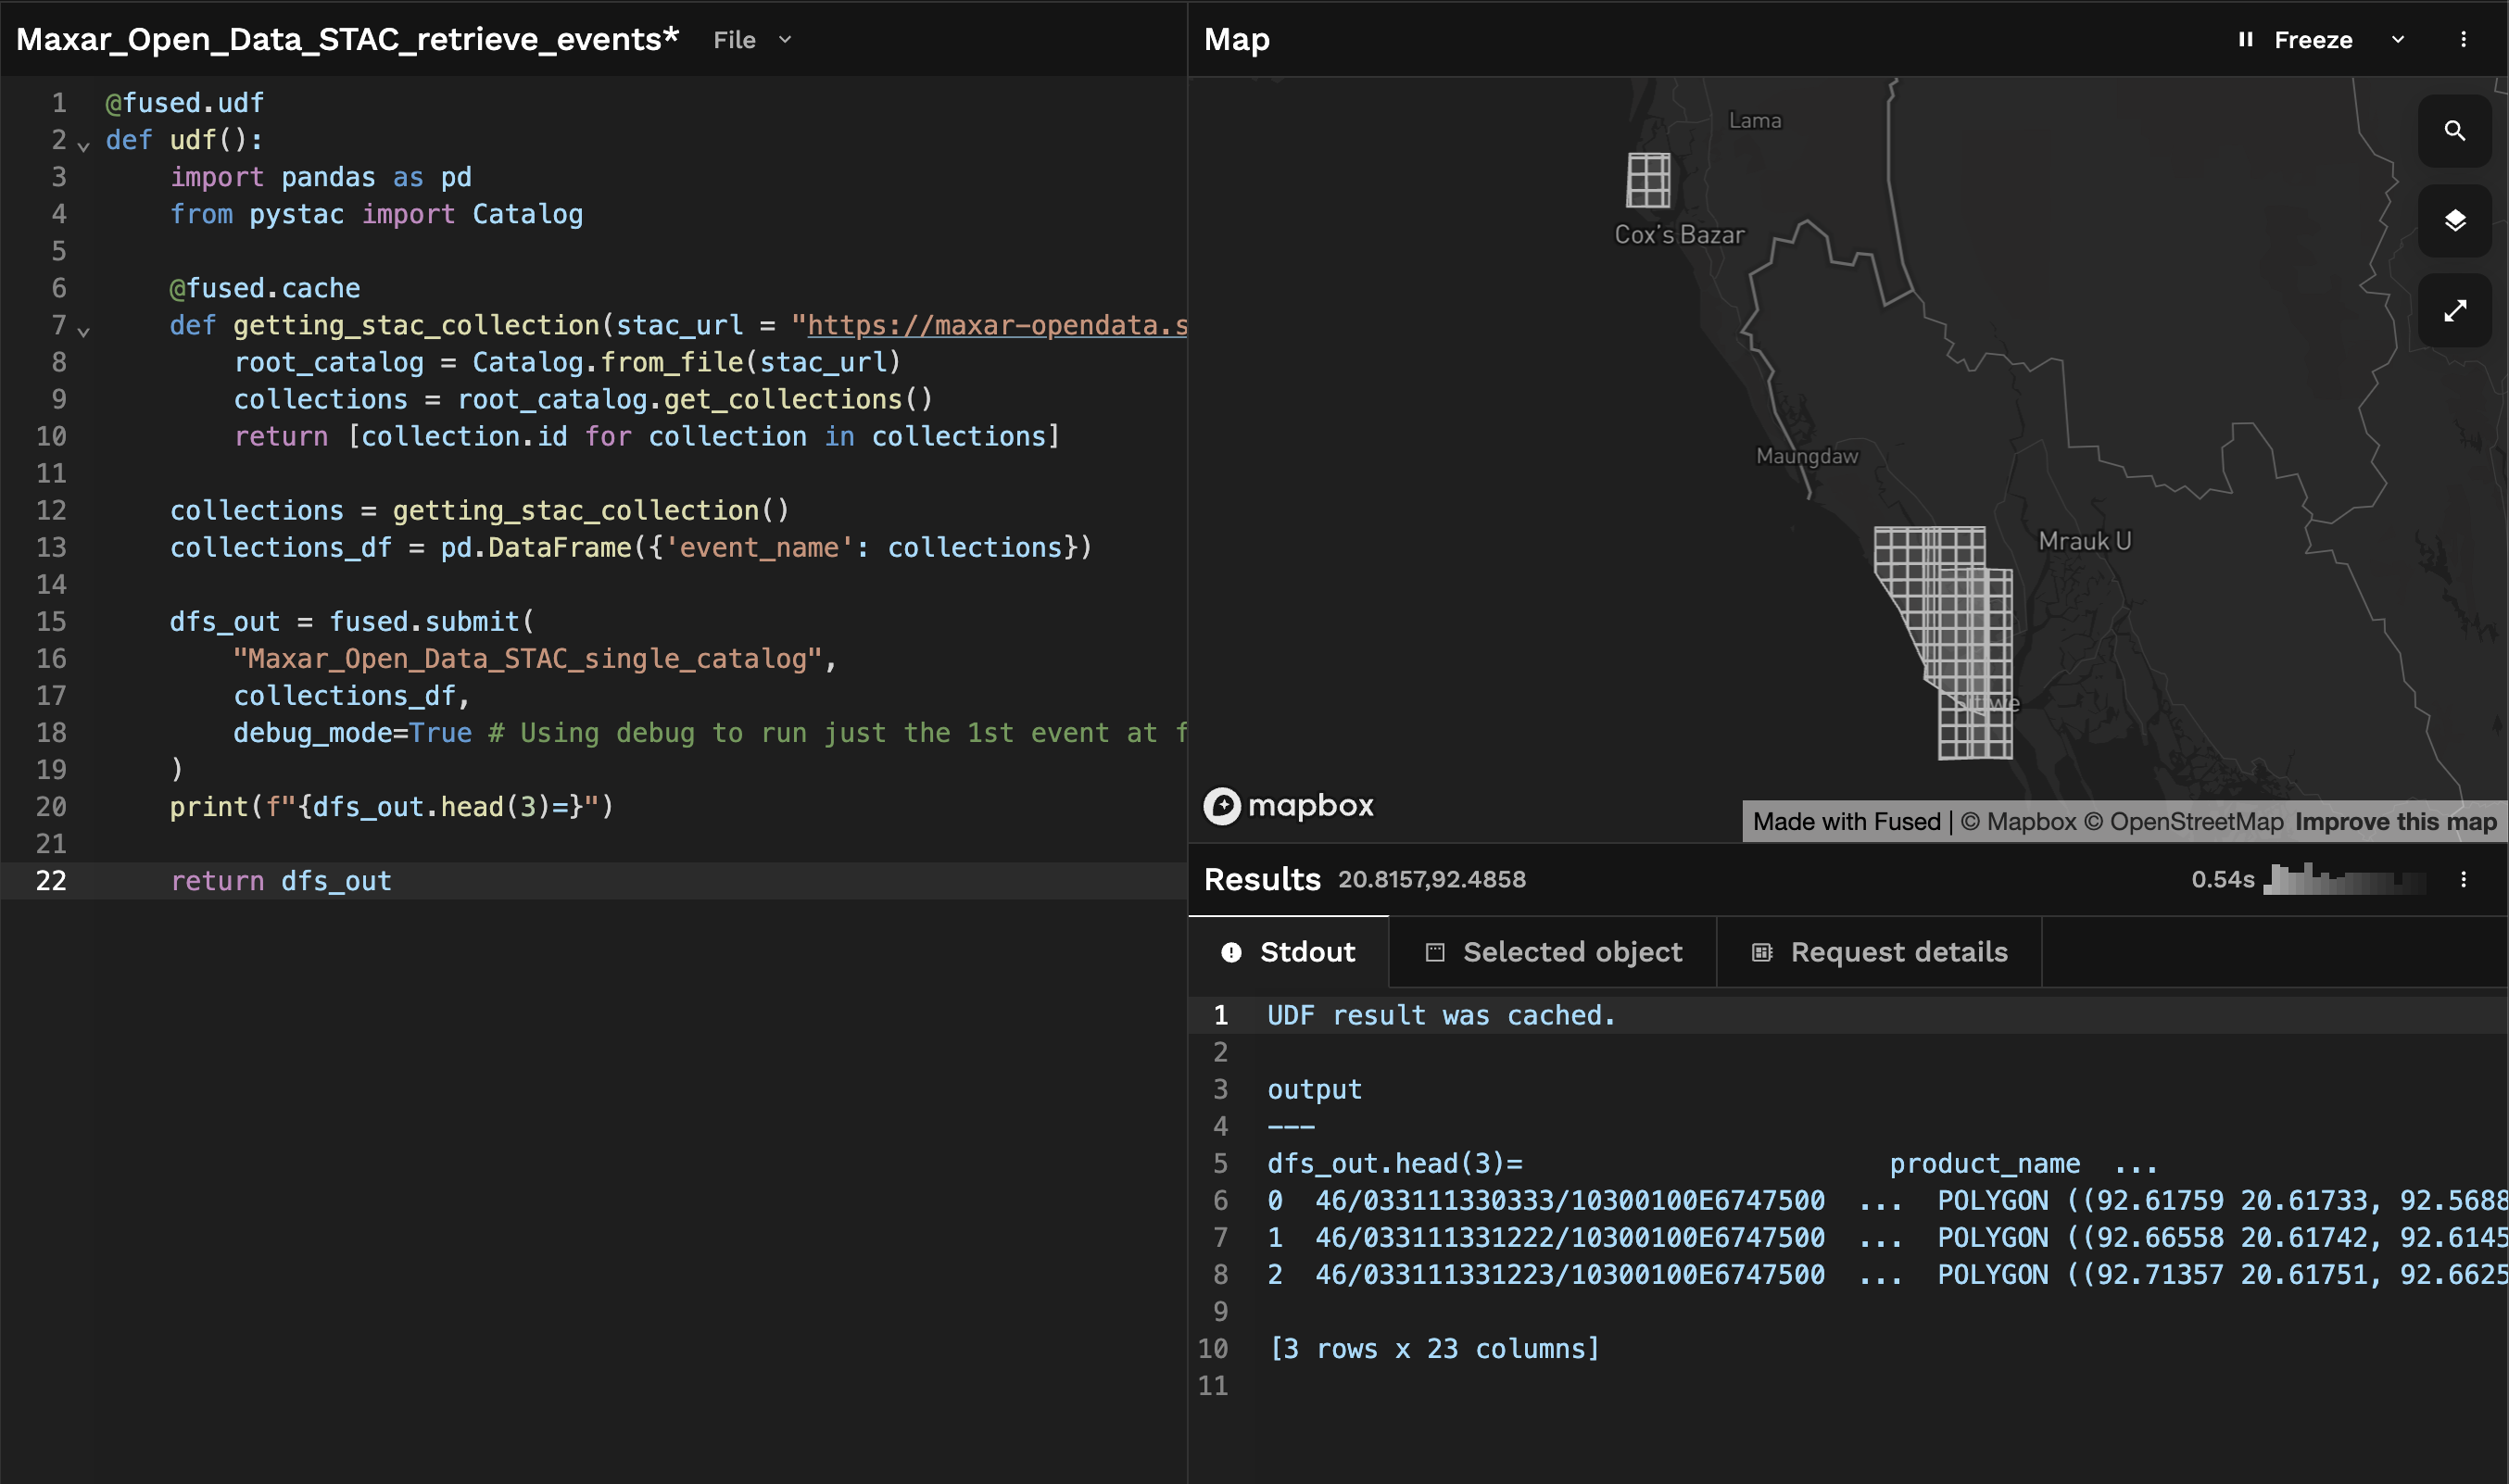
dfs_out = fused.submit(
"Maxar_Open_Data_STAC_single_catalog",
collections_df,
debug_mode=True # Using debug to run just the 1st event at first
)
print(f"{dfs_out.head(3)=}")
return dfs_out
Let's unpack this:
- We're calling the UDF called
"Maxar_Open_Data_STAC_single_catalog"that we renamed earlier overcollections_df. At the time of writing this example this represents 46 events§ - We use
fused.submit(..., debug_mode = True)to run only the 1st value fromcollections_df. This allows us to test that ourfused.submit()job is written correctly.
fused.submit() allows you to run a single over a list / dataframe of inputs in parallel. Under the hood Fused spins up many realtime instances (see technical docs for details) that will each run the given UDF (in this case "Maxar_Open_Data_STAC_single_catalog") all at the same time.
This is a powerful way to scale a process with just a single function call.
Read the dedicated Docs section on fused.submit() for more
Getting all Maxar open data
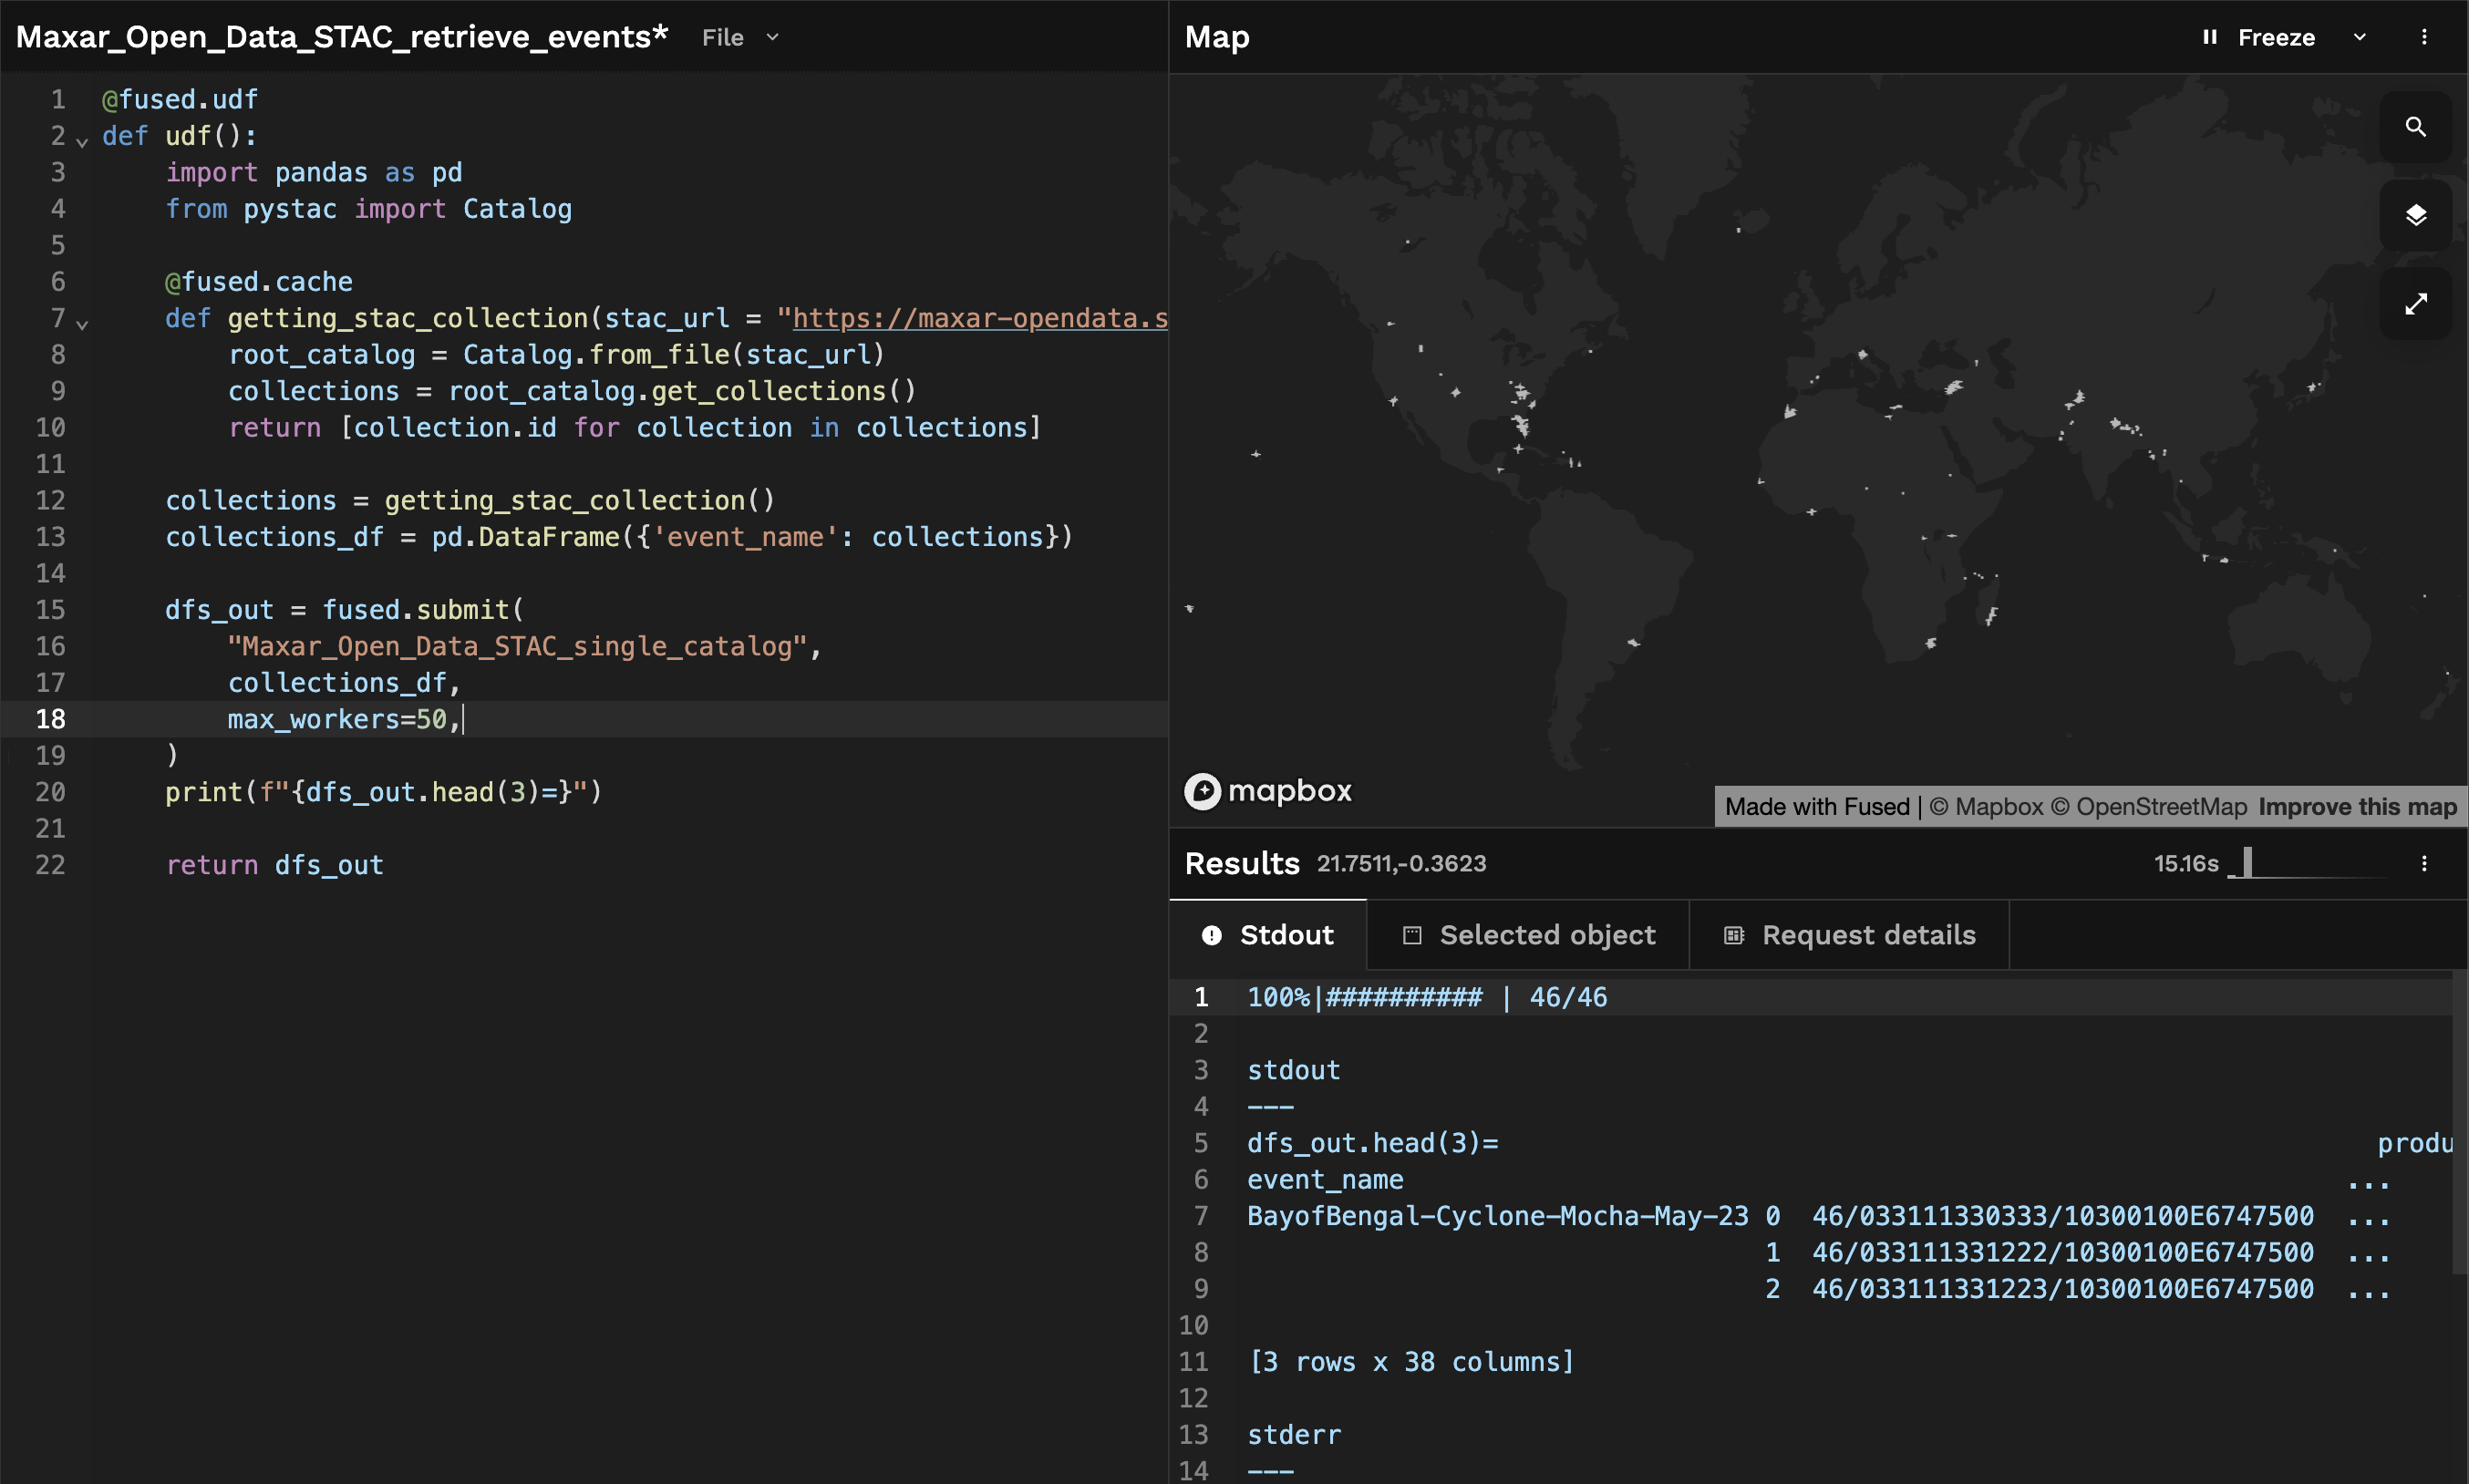
Once we're confident that our fused.submit() job setup is correct, we can remove debug_mode=True (it's set to False by default) and run our UDF across all events.
We can also increase the number of max_workers, as we have 46 events and the default max_workers is set to 32. We can ask Fused server to thus spin up more instances for us so this parallel job is even faster:
@fused.udf
def udf():
    import pandas as pd
    from pystac import Catalog

    @fused.cache
    def getting_stac_collection(stac_url = "https://maxar-opendata.s3.amazonaws.com/events/catalog.json"):
        root_catalog = Catalog.from_file(stac_url)
        collections = root_catalog.get_collections()
        return [collection.id for collection in collections]

    collections = getting_stac_collection()
    collections_df = pd.DataFrame({'event_name': collections})

    dfs_out = fused.submit(
        "Maxar_Open_Data_STAC_single_catalog",
        collections_df,
        max_workers=50, # Increasing the number of max_workers as we have more than events than the default value
    )
    print(f"{dfs_out.head(3)=}")

    return dfs_out
After a few seconds, we get back a GeoDataFrame containing all the Maxar open data STAC catalogs:
This allows us to do a few different things:
- Explore all of the available Maxar Open Data on a map directly. This helps us see what data Maxar has available that might be of interest, to compare image quality across areas for example.
- Offer a wide variety of high resolution imagery to query against. For example retrieving as much the cloud free imagery as possible
Choosing 1 Event to display
With access to all the images from Maxar, we can navigate the map and choose any image we'd like to display. Let's select one and display it in Workbench.
First we can use the Results Tab to find the URL of an image we'd like to display:
@fused.udf
def udf(
    bounds: fused.types.Bounds,
    path: str = "https://maxar-opendata.s3.amazonaws.com/events/Emilia-Romagna-Italy-flooding-may23/ard/33/031111210233/2023-05-23/1050010033C95B00-visual.tif",
    chip_len=256,
    display_extent: bool = True
):
    import rasterio
    import numpy as np
    import geopandas as gpd
    from shapely.geometry import box
    from rasterio.session import AWSSession

    # Getting just bounds of image so we can zoom to layer
    if display_extent:
        print("Returning extent")
        with rasterio.Env(session=AWSSession()):
            with rasterio.open(path) as src:
                bbox_gdf = gpd.GeoDataFrame(geometry=[box(*src.bounds)],crs=src.crs)
        bbox_gdf.to_crs(4326, inplace=True)

        return bbox_gdf

    # Otherwise reading the GeoTiff
    else:
        print("Returning image")
        utils = fused.load("https://github.com/fusedio/udfs/tree/5432edc/public/common/").utils
        tiles = utils.get_tiles(bounds)

        arr = utils.read_tiff(tiles, path, output_shape=(chip_len, chip_len))
        print(f"{arr.shape=}")
        return arr
Unpacking this UDF:
- This UDF takes :
- a
boundsobject. This allows us to pass the current Workbench Map Viewport to our UDF pathrepresents the path on S3 to one of the images we want to displaychip_len: The size of the chip size we'd like our image to display in
- a
These images can be loaded using bounds and Tile mode because Maxar has provided these images as Cloud Optimized Geotiffs. This allows us to leverage their tiles & overviews and only load the data we need as we pan around the map
We can check this by reading the metadata in CLI with gdalinfo and see that each band has Block, meaning is tiled:
gdalinfo /vsis3/maxar-opendata/events/Cyclone-Chido-Dec15/ard/38/300200022120/2024-06-11/104001009713BA00-visual.tif

>>>
Driver: GTiff/GeoTIFF

...

Band 1 Block=512x512 Type=Byte, ColorInterp=Red
  Overviews: 8704x8704, 4352x4352, 2176x2176, 1088x1088, 544x544, 272x272
  Mask Flags: PER_DATASET
  Overviews of mask band: 8704x8704, 4352x4352, 2176x2176, 1088x1088, 544x544, 272x272
Band 2 Block=512x512 Type=Byte, ColorInterp=Green
  Overviews: 8704x8704, 4352x4352, 2176x2176, 1088x1088, 544x544, 272x272
  Mask Flags: PER_DATASET
  Overviews of mask band: 8704x8704, 4352x4352, 2176x2176, 1088x1088, 544x544, 272x272
Band 3 Block=512x512 Type=Byte, ColorInterp=Blue
  Overviews: 8704x8704, 4352x4352, 2176x2176, 1088x1088, 544x544, 272x272
  Mask Flags: PER_DATASET
  Overviews of mask band: 8704x8704, 4352x4352, 2176x2176, 1088x1088, 544x544, 272x272
Running the above UDF we can for now return the extent of the image:
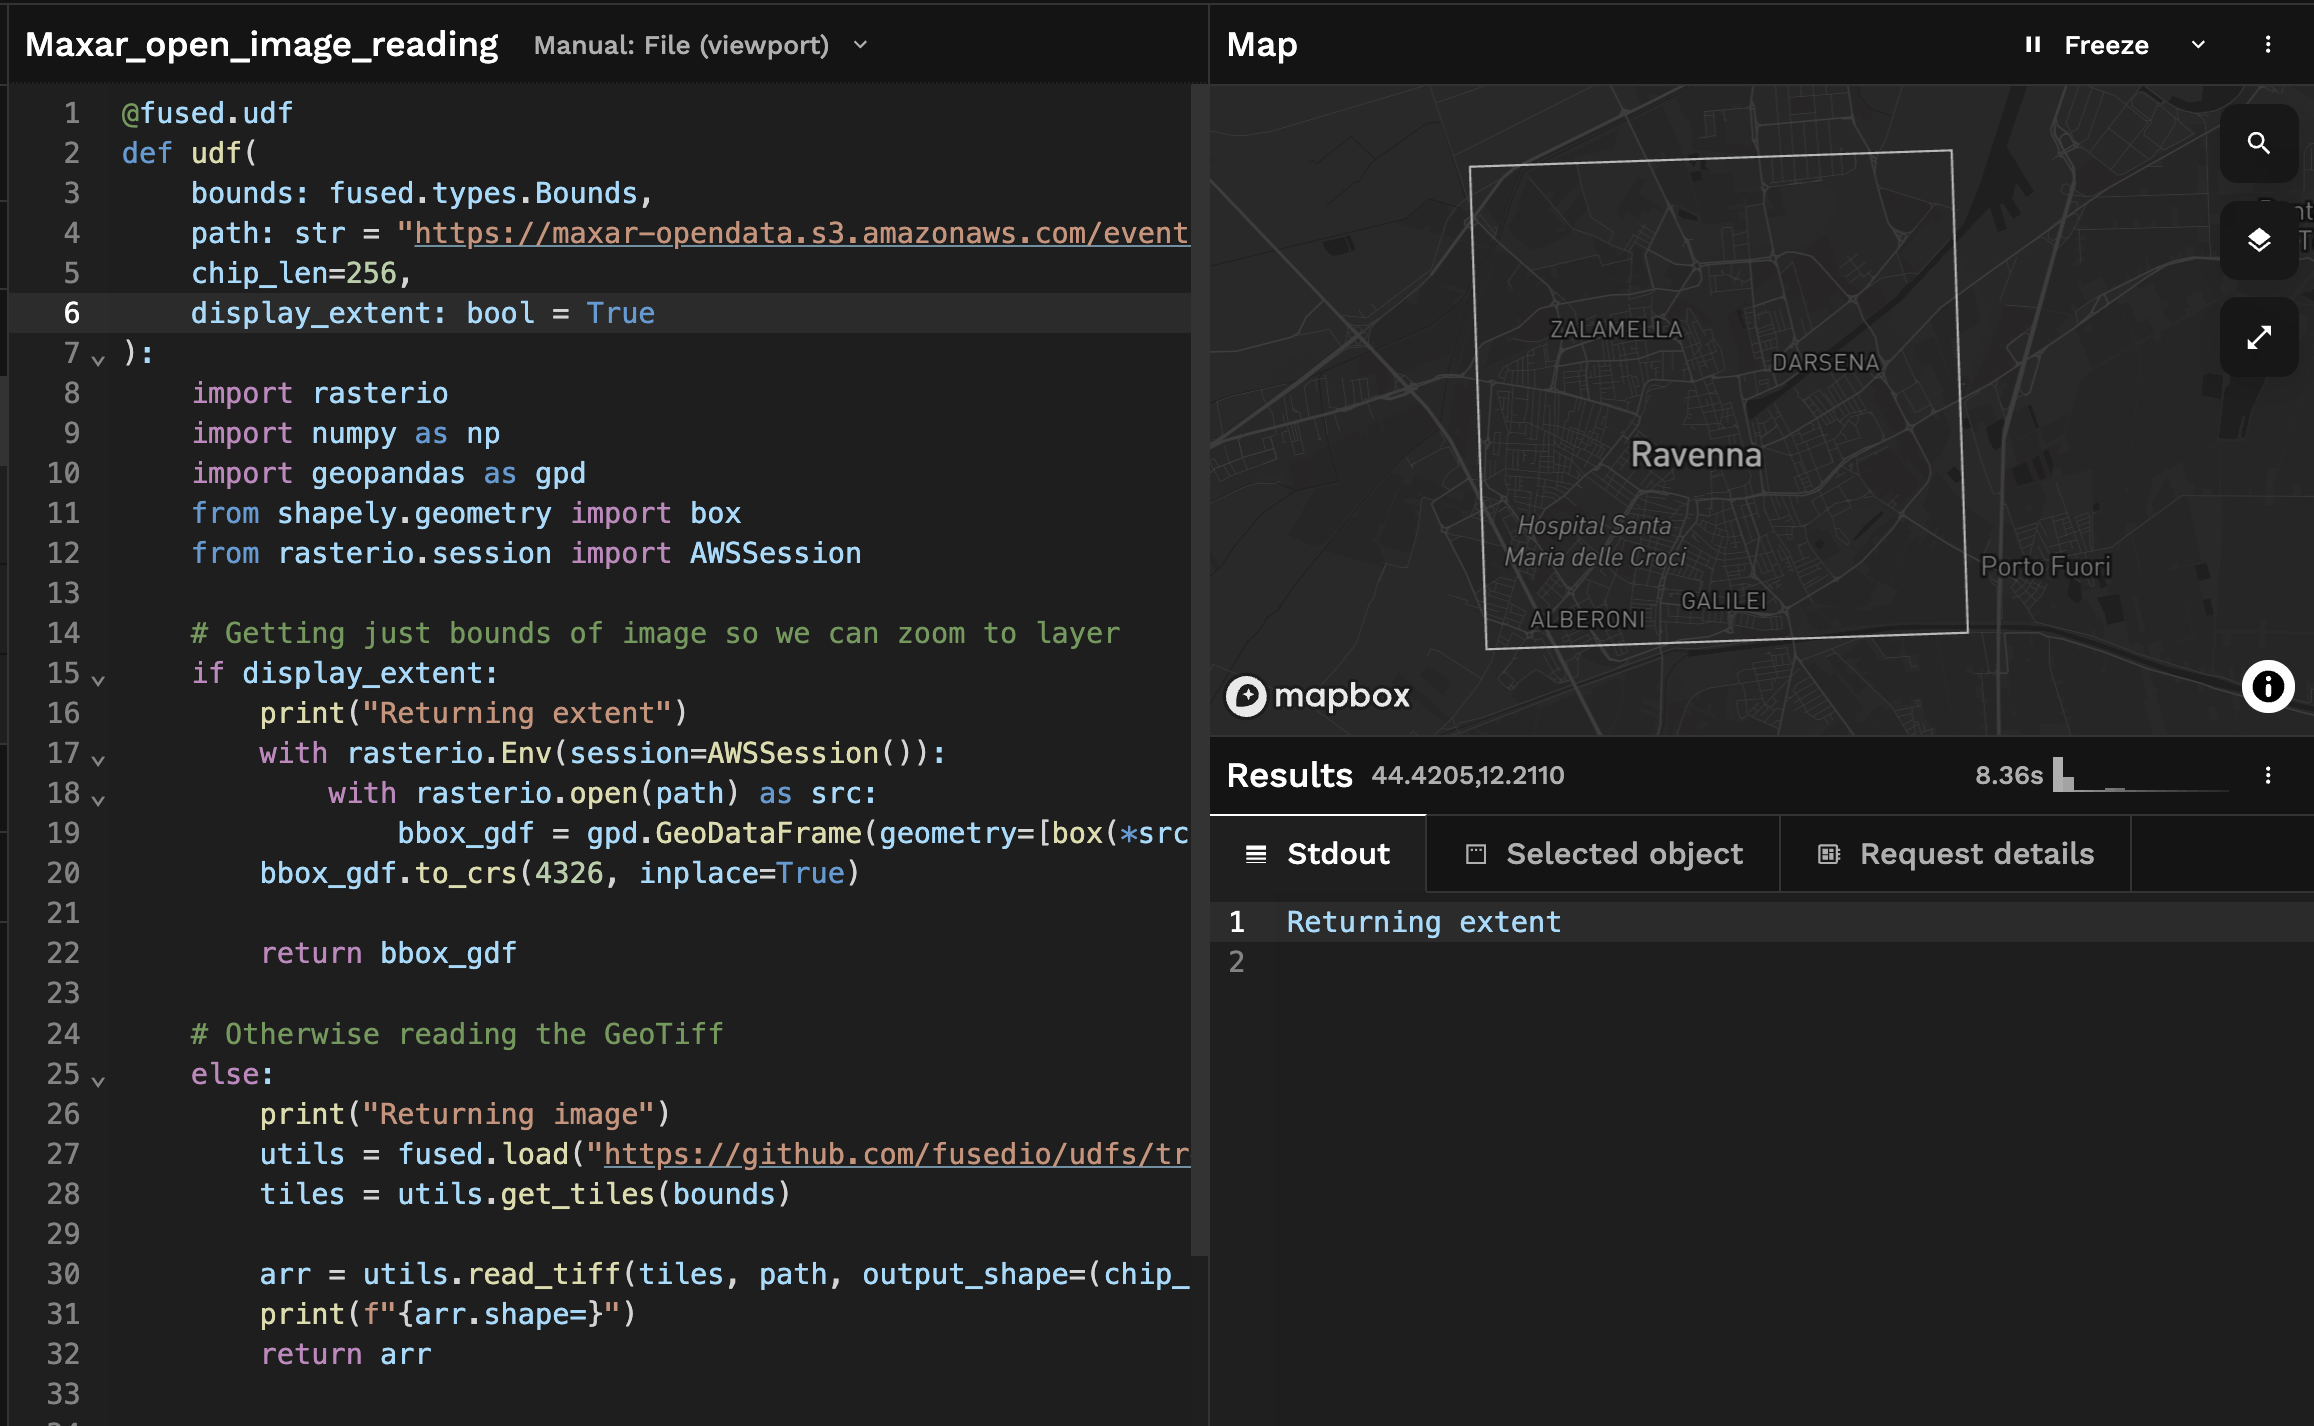
This allows us to introduce 2 concepts in Workbench:
1. Setting a default view in Workbench
After getting the extent of our image, we're going to Zoom to layer and set this view as the default view:
This allows us to to any change we want to this UDF or pan anywhere on the map and always be able to zoom back to this default view!
2. Displaying the image
Now we can edit our UDF to return the image by changing display_extent to False:
@fused.udf
def udf(
    bounds: fused.types.Bounds,
    path: str = "https://maxar-opendata.s3.amazonaws.com/events/Emilia-Romagna-Italy-flooding-may23/ard/33/031111210233/2023-05-23/1050010033C95B00-visual.tif",
    chip_len=256,
    display_extent: bool = False
):
    import rasterio
    import numpy as np
    import geopandas as gpd
    from shapely.geometry import box
    from rasterio.session import AWSSession

    # Getting just bounds of image so we can zoom to layer
    if display_extent:
        print("Returning extent")
        with rasterio.Env(session=AWSSession()):
            with rasterio.open(path) as src:
                bbox_gdf = gpd.GeoDataFrame(geometry=[box(*src.bounds)],crs=src.crs)
        bbox_gdf.to_crs(4326, inplace=True)

        return bbox_gdf

    # Otherwise reading the GeoTiff
    else:
        print("Returning image")
        utils = fused.load("https://github.com/fusedio/udfs/tree/5432edc/public/common/").utils
        tiles = utils.get_tiles(bounds)

        arr = utils.read_tiff(tiles, path, output_shape=(chip_len, chip_len))
        print(f"{arr.shape=}")
        return arr
This change returns the image instead of the extent, but it returns the image all at once, because Workbench is set to "File" mode by default
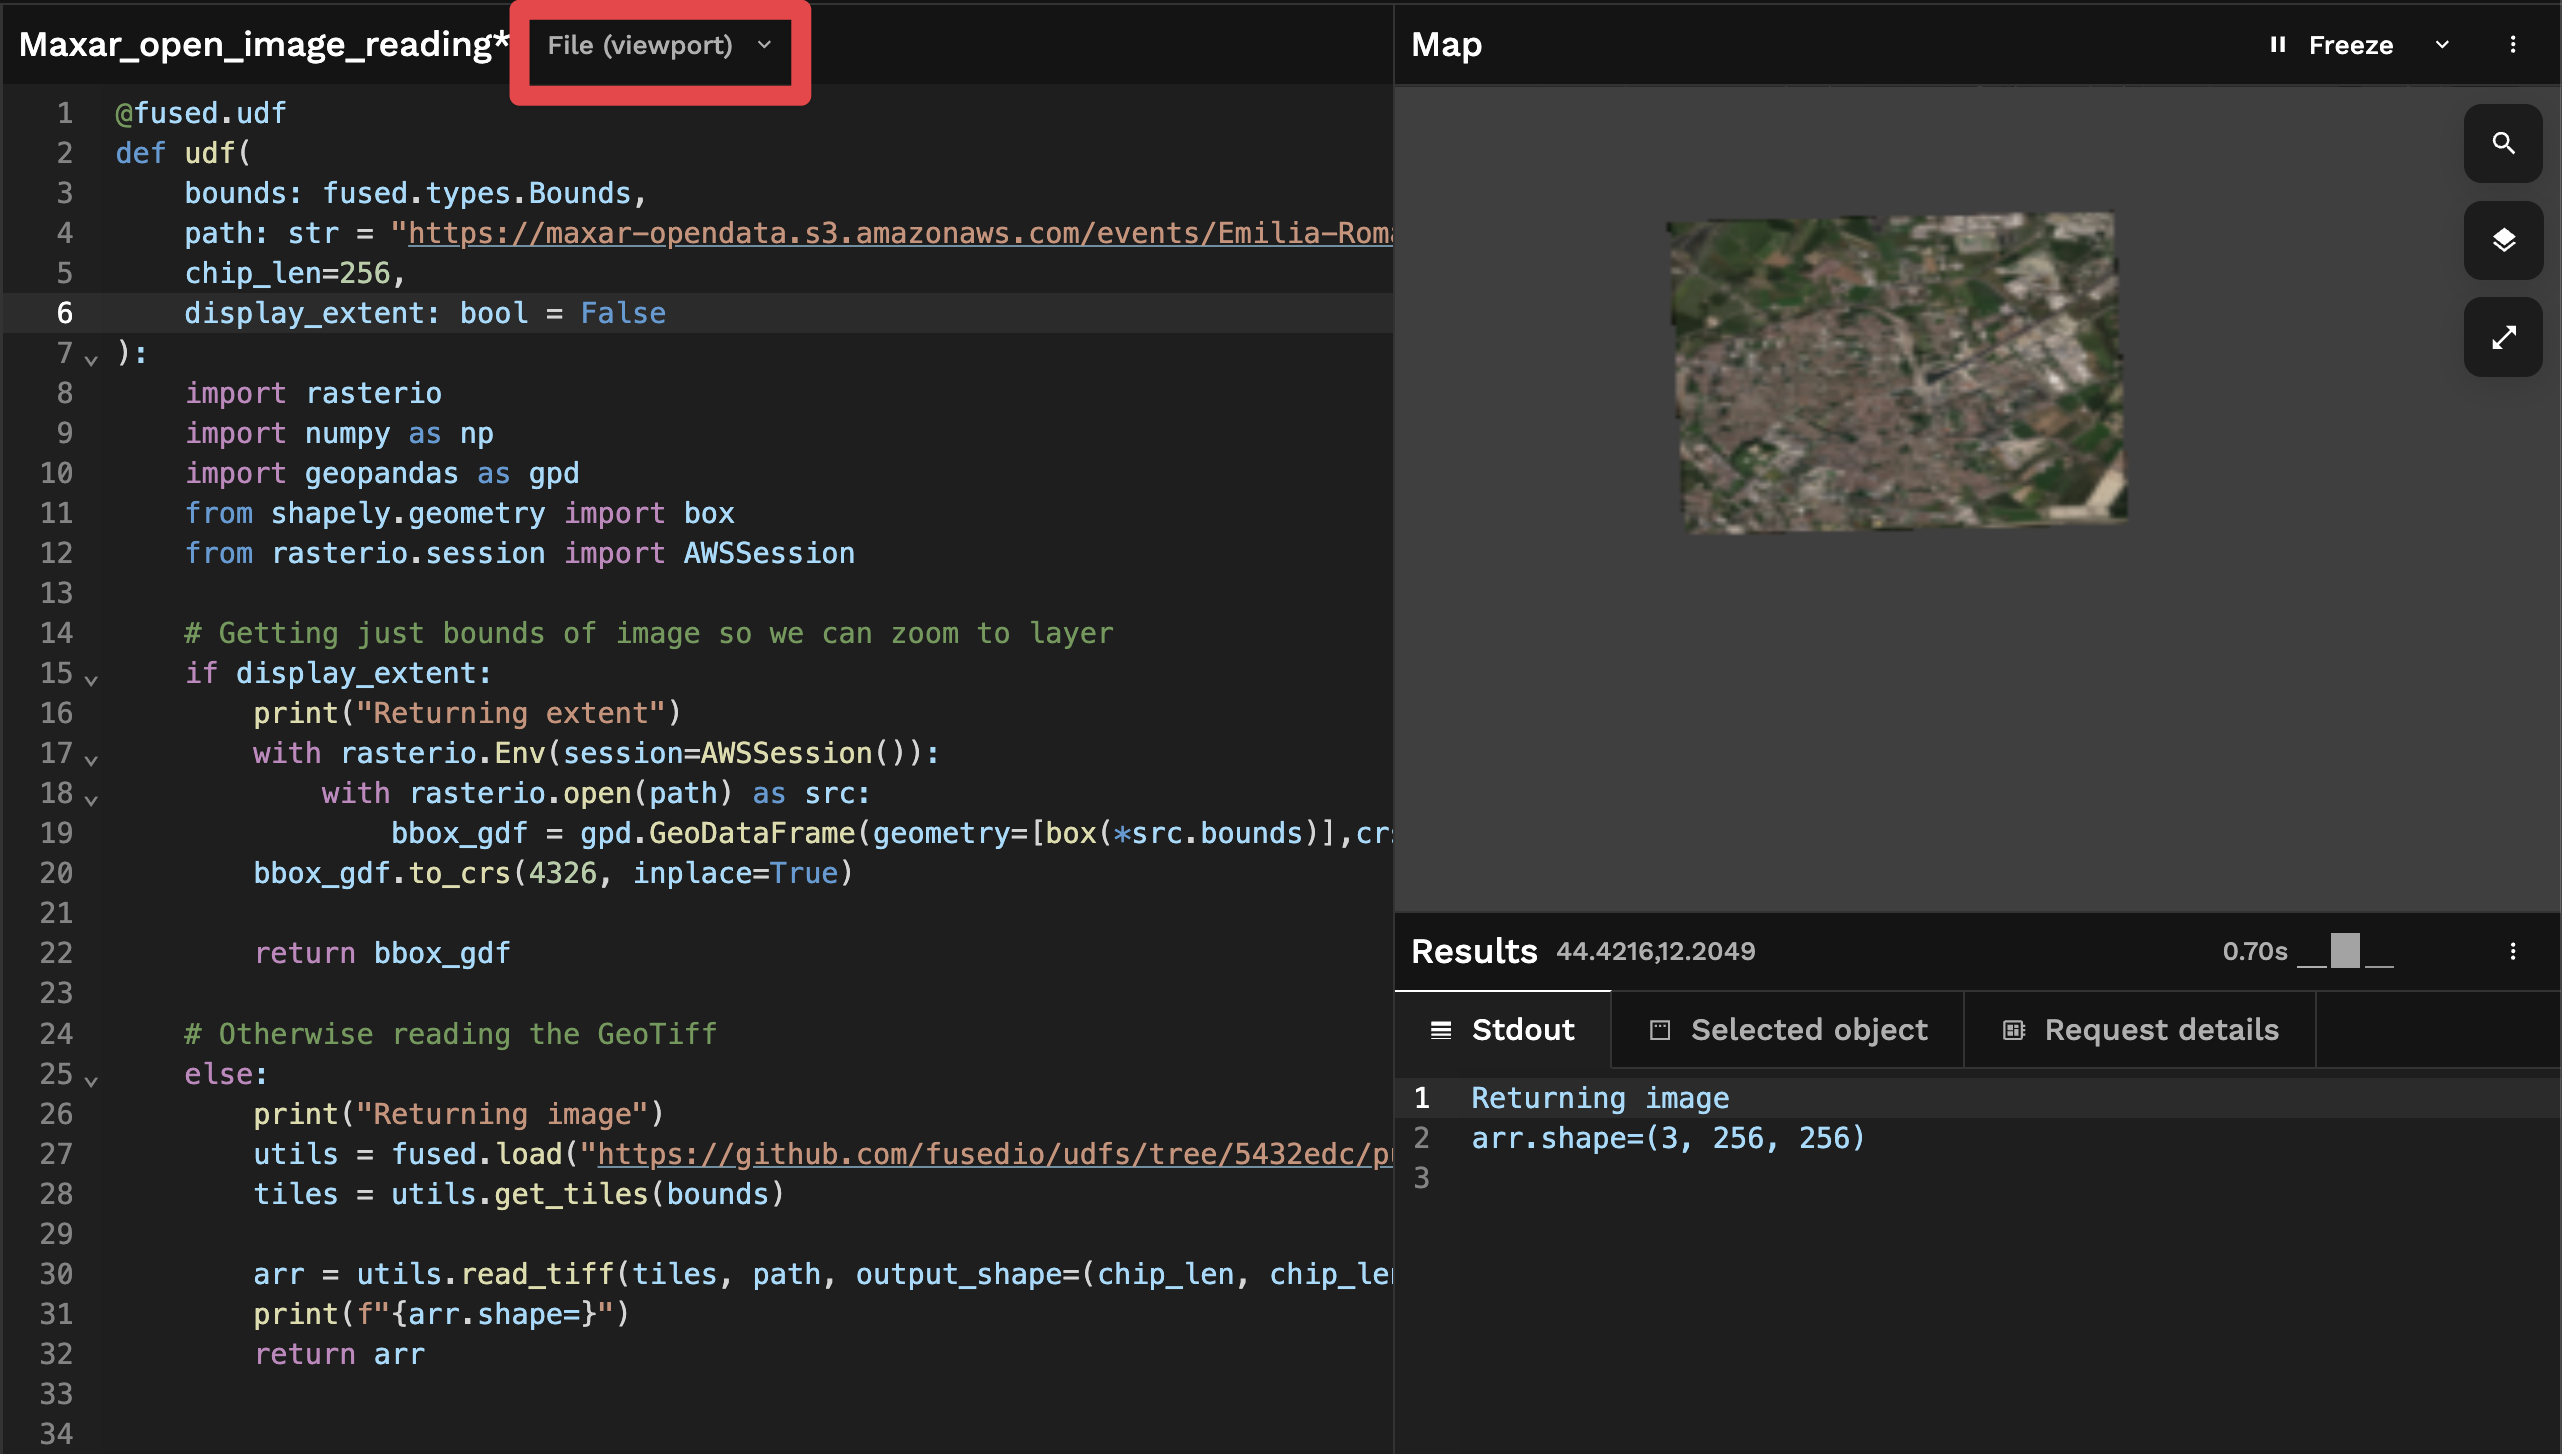
If you reproduce this yourself and pan around the map you'll notice:
- We see the whole image but with a relatively low resolution.
- Nothing changes as we pan around the map (resolution doesn't change)
We can change this by setting Workbench to "Tile" mode:
Under the hood, switching to "Tile" mode tells Workbench to run this UDF not only 1 times, but by breaking it up into Mercantile tiles. This is why you see the image being broken up into a grid of tiles.
These different modes don't change what code is being executed, as our udf didn't change. It's only changing what geospatial parameters are being passed:
- "File" mode passes the
boundsof the current viewport (run 1 time§) - "Tile" mode passes the
boundsof the current viewport broken up into a grid of tiles (run 1 per each tile)
Next steps
We've shown you how to:
- Use
fused.submit()to run a UDF in parallel - Use
@fused.cacheto cache requests to reduce costs and improve performance - Use Workbench to display images in different modes
If you want to go a bit further you could:
- Explore the Best Practices to make the most of UDFs or learn handy tips to use Workbench as its fullest
- Go more in depth with "File" & "Tile" modes in Workbench
- Dive into the different ways Fused allows you to use caching to improve performance